Advanced Widgets
Tagging Widget
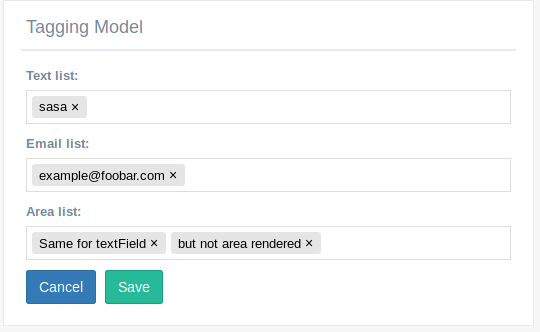
This widget approach used tagify js for make CharField and Textfield taggiable, all data are saved separated by comma
Example of use:
from djgentelella.forms.forms import GTForm
from djgentelella.widgets.tagging import TaggingInput, EmailTaggingInput
class TaggingForm(GTForm, forms.ModelForm):
    class Meta:
        model = TaggingModel
        fields = '__all__'
        widgets = {
        'text_list': TaggingInput,
        'email_list':  EmailTaggingInput,
        'area_list': TaggingInput
        }
EmailTaggingInput allow only tag emails, so they make a validation on GUI.
Note
No email validation are made on server side.
NumberKnobInput widget

It is a kind of selector to input numerical values. You can add this widget in a IntegerField or FloatField.
from djgentelella.forms.forms import GTForm
class FooModelForm(GTForm, forms.ModelForm):
    class Meta:
        model = Foo
        fields = (
            'number_of_eyes',
            'speed_in_miles_per_hour',
            'age'
        )

    widgets = {
         'number_of_eyes': knobwidget.NumberKnobInput(attrs={}),
         'speed_in_miles_per_hour': knobwidget.NumberKnobInput(
                                         attrs={
                                             "data-min": 1,
                                             "data-step": 0.1,
                                             "data-max": 50
                                         }),
         'age': knobwidget.NumberKnobInput()
    }
As you can see in the previous code you can add min, max values as also a step increment.
Color widget
How to implement it??
After add ‘djgentelella’ to INSTALLED_APPS variable in the settings file, you will be able to use this widget.
You can add this widget in the input field of a form in the following way:
from djgentelella.widgets.color import StyleColorInput, DefaultColorInput, HorizontalBarColorInput, VerticalBarColorInput, InlinePickerColor
from djgentelella.forms.forms import GTForm
class ColorWidgetsForm(GTForm, forms.ModelForm):
    defaultColorInput = forms.CharField(widget=DefaultColorInput)
    styleColorInput = forms.CharField(widget=StyleColorInput(attrs={"value": "#0014bb", "id": "c2"}))

    class Meta:
        model = Colors
        fields = "__all__"
        widgets = {
            "horizontalBarColorInput": HorizontalBarColorInput,
            "verticalBarColorInput": VerticalBarColorInput(attrs={"value": "#0014bb", "id": "c4"}),
        }
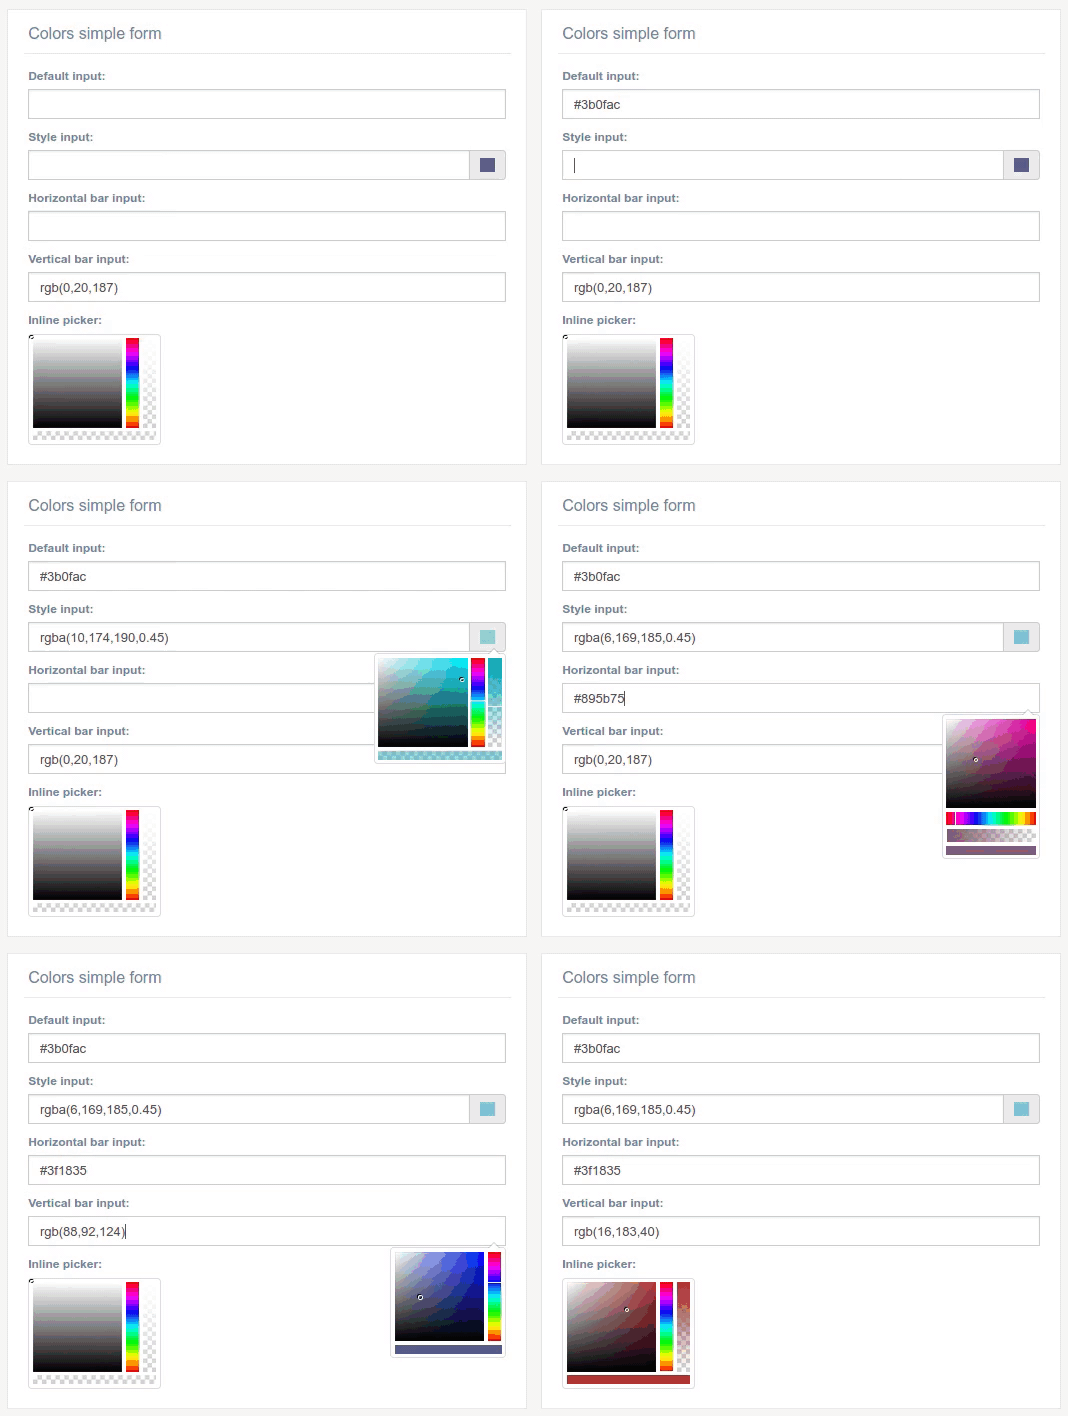
As you can see, you can pass default attributes in attrs kwarg param of the function like value and id. The color can be remembered after refresh the page.
Exist four types of color widget: DefaultColorInput, StyleColorInput, HorizontalBarColorInput, VerticalBarColorInput
InputMask widget
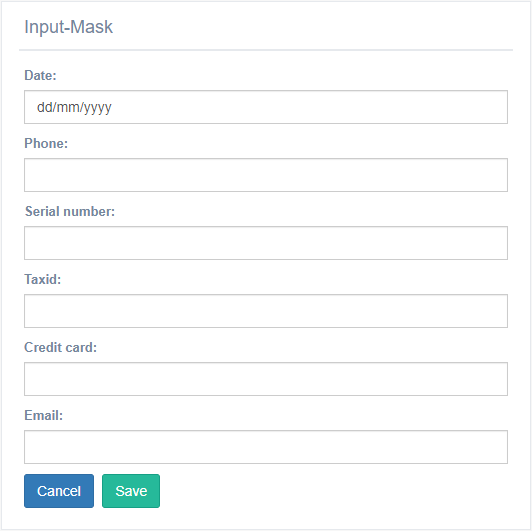
It is a kind of mask to input date, email and text values. You can uses this widget in a DateField, CharField , EmailField
from djgentelella.forms.forms import GTForm
from djgentelella.widgets import core as widget
class InputMaskForms(forms.ModelForm, GTForm):
    class Meta:
        model = models.InputMask
        fields = '__all__'
        widgets = {
            'phone': widget.PhoneNumberMaskInput,
            'date': widget.DateMaskInput,
            'serial_number': widget.SerialNumberMaskInput,
            'taxid': widget.TaxIDMaskInput,
            'credit_card': widget.CreditCardMaskInput,
            'email': widget.EmailMaskInput,
        }
Exist six types of InputMask widget: PhoneNumberMaskInput, DateMaskInput, SerialNumberMaskInput, TaxIDMaskInput,CreditCardMaskInput,EmailMaskInput
DateRange widget
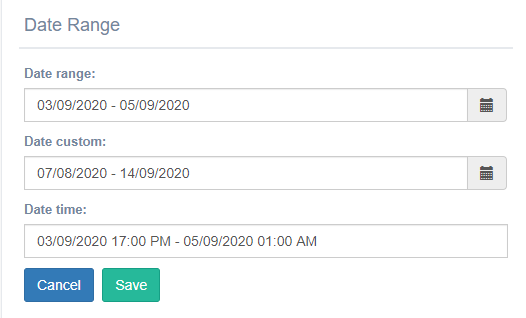
It is a calendar to select range between dates . You can uses this widget in a * CharField * and * TextField *
from djgentelella.widgets import core as widget
from djgentelella.forms.forms import GTForm
from demoapp import models
class DateRangeForms(forms.ModelForm, GTForm):
    class Meta:
        model = models.yourmodel
        fields = '__all__'
        widgets = {
            'date_range': widget.DateRangeInput,
            'date_range_custom': widget.DateRangeInputCustom,
            'date_time': widget.DateRangeTimeInput,
        }
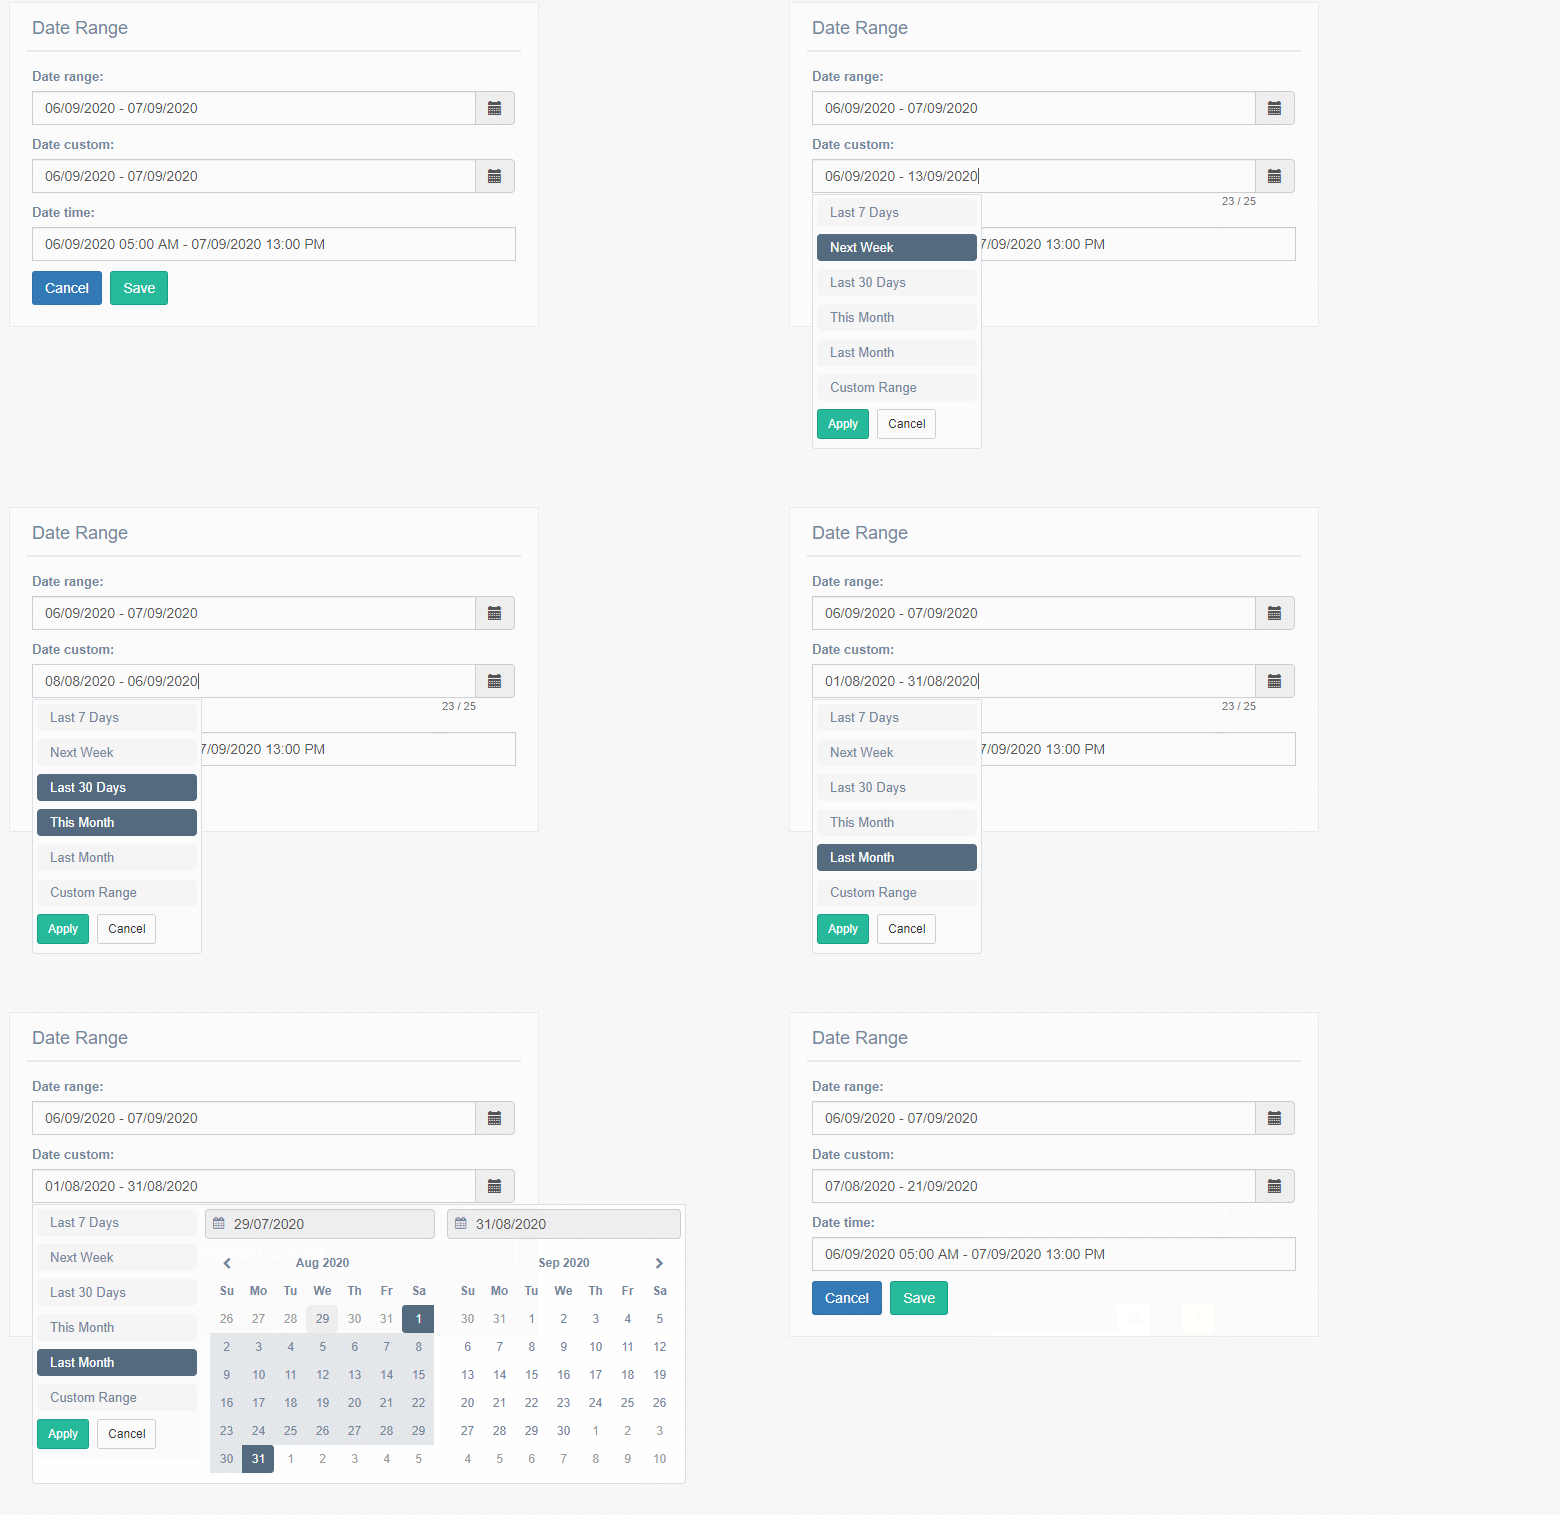
Exist three types of daterange widget: DateRangeInput, DateRangeInputCustom, DateRangeTimeInput
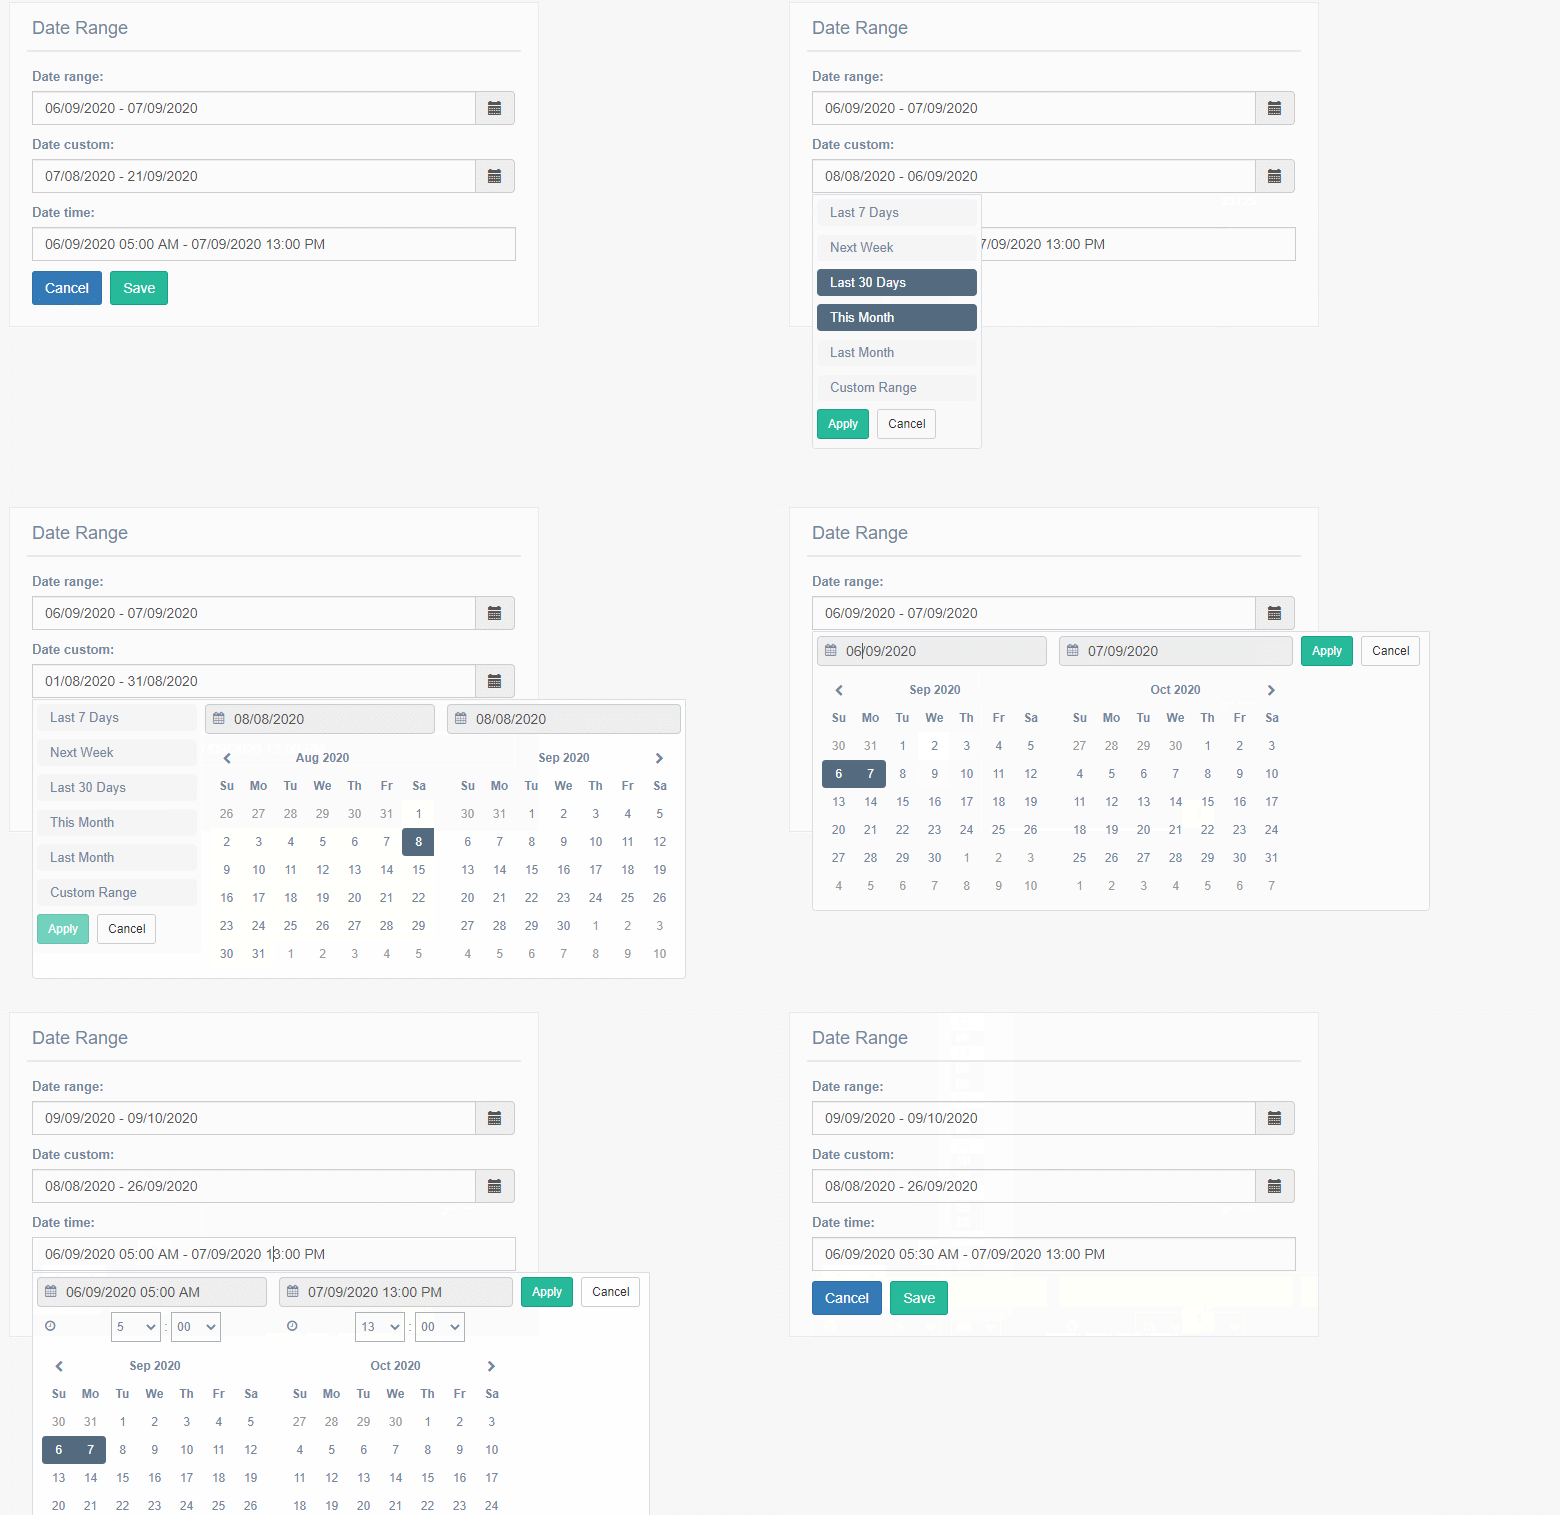
DateRangeInput: To select the dates you need to click on the field and then the calendars appear and when choosing the dates click on apply.
DateRangeTimeInput: The only thing differences about DateRangeInput is this widget lets add time.
DateRangeInputCustom: this widget contains six options to choose from(Last 7 days, Next Week, Last 30 days, This month, Last month and Custom Range) Note: When you use custom range option of DateRangeInputCustom with need select the days similar to DateRangeInput
TimeLine Widget

Note
This widget is ReadOnly so no data input is send on form submit.
2 requirements must be achieved to use these widgets
Create a lookup channel in
app/gttimeline.pybased in the model we want to use as options in the widget.Replace default widget in form with
UrlTimeLineInput.
Defining Lookups for usage in widgets
An example on how a lookup must be defined:
import datetime
from djgentelella.groute import register_lookups
from djgentelella.views.timeline import BaseTimelineView

@register_lookups(prefix="timeline", basename="exampletimeline")
class TimelineExample(BaseTimelineView):
    def get_title(self):
        pass
    def get_events(self):
        return []
    def get_scale(self):
        return 'human'
    def get_eras(self):
        return []
Based in above example we need:
- A decorator named register_lookups defined above the lookup class that receives two parameters:
A prefix, which is basically the model name in lowcaps
A basename, which is a meaningful name that will help you differentiate between multiple lookups
A class that inherits from the custom class BaseTimelineView which is responsible of creating an url that exposes the model data in a way the widget urderstands it, so to make it works the class needs overwrite the methods.
More see https://timeline.knightlab.com/docs/json-format.html#json-slide
Usage in forms.py
In model based form:
from djgentelella.widgets.timeline import UrlTimeLineInput
from djgentelella.forms.forms import GTForm
from django.urls import reverse_lazy
class PeopleLineForm(GTForm, forms.ModelForm):
    timeline = forms.CharField(widget=UrlTimeLineInput(
            attrs={"data-url": reverse_lazy('exampletimeline-list'),
                    'style': "height: 500px;",
                     "data-option_language": 'es'
            }), required=False)
    class Meta:
        model = models.MyModel
        fields = '__all__'
- As noticed in above example, the last steps are:
Create a CharField with widget as UrlTimeLineInput add data-url including the basename plus -list.
Se field as required = False
You can set initial data with form(initial={}) changing the data-url attribute when value is not None on the field.
Passing options to timelineJS3
You can pass timelineJS3 options using data attrs in widget attr parameter.
In the example data-option_language the prefix data- is used to indicate data Html element, the section option\_ is used to indicate that this attribute is a
timeline option and language is the option name.
More see: https://timeline.knightlab.com/docs/options.html
Note
Static files for this widget are not loaded by default so you need to load CSS and JS for this widget to prevent.
You can define what library you want using define_true tag, in this way:
{% load gtsettings %}
{% block pre_head %}
    {% define_true  "use_readonlywidgets" %}
{% endblock %}
or set on setting.py the follow dict to load always all static
DEFAULT_JS_IMPORTS = {
    'use_readonlywidgets': True
}
AutoCompleteSelect and AutocompleteSelectMultiple widgets

2 requirements must be achieved to use these widgets
Create a lookup channel in
app/gtselects.pybased in the model we want to use as options in the widget.Replace default widget in form with
AutocompleteSelectorAutocompleteSelectMultiple.
Defining Lookups for usage in widgets
An example on how a lookup must be defined:
from djgentelella.groute import register_lookups
from djgentelella.views.select2autocomplete import BaseSelect2View
from yourapp.models import models

@register_lookups(prefix="person", basename="personbasename")
class PersonGModelLookup(BaseSelect2View):
    model = models.Person
    fields = ['name']
Based in above example we need:
- A decorator named register_lookups defined above the lookup class that receives two parameters:
A prefix, which is basically the model name in lowcaps
A basename, which is a meaningful name that will help you differentiate between multiple lookups
- A class that inherits from the custom class BaseSelect2View which is responsible of creating an url that exposes the model data in a way the widget urderstands it, so to make it works the class needs:
A model to work with.
A list of fields from the model that the inherited class will use as filtering options when returning data to the widget.
If a more customized class is desired the next options can be overwritten to achieve it:
ref_field: can be used to select a specific field from the model with a list behavior (manytomanyfield or fields with choices) and use it to filter options.
ref_name: combined with ref_field, this field receives a list of strings that will be evaluated if any of its elements is contained in the ref_field field.
text_separator: if provided, the class will use it to generate a list separated with the given value from result data.
text_wrapper: if provided, the class will wrap each element of the result query with the value given.
order_by: if provided, the class will used the given field to order the result query, the default field is the model pk.
Usage in forms
In model based form:
from djgentelella.widgets.selects import AutocompleteSelect, AutocompleteSelectMultiple
from djgentelella.forms.forms import GTForm
class PeopleGroupForm(GTForm, forms.ModelForm):
    class Meta:
        model = models.PeopleGroup
        fields = '__all__'
        widgets = {
            'name': TextInput,
            'people': AutocompleteSelectMultiple("personbasename"),
            'comunities': AutocompleteSelectMultiple("comunitybasename"),
            'country': AutocompleteSelect('countrybasename')
        }
- As noticed in above example, the last steps are:
Replace the default widget with
AutocompleteSelectorAutocompleteSelectMultiple(this may vary depending of the kind of form used).Send the basename we provided in the lookup class decorator (see previous example) to the widget and it’s ready for usage!
Widget inside modals
Select2 has problems for deal with forms inside modals, but it has an attribute to work with modals, so you can add data-dropdownparent as attr for example
<div id="exampleModal" class="modal" tabindex="-1">
    <div class="modal-body">
       {{form.has_horizontal}}
    </div>
<div>
in forms.py
class Meta:
  widgets={
    'comunities': AutocompleteSelectMultiple("comunitybasename", attrs={'data-dropdownparent': '#exampleModal'}),
  }
Selects groups
Using attrs you can autocomplete options based on others select2, to do that just set data-related as True, add the groupname data-groupname, this need to be shared by all select on group, and add the position order data-pos, this needs to be in ascending order number, is used to know who is the next select when one select is changed, so you need to be sure that numbers don’t repeat and are in order.
class ABCDEGroupForm(GTForm, forms.ModelForm):
  class Meta:
    model = models.ABCDE
    fields = '__all__'
    widgets = {
        'a': AutocompleteSelectMultiple("a", attrs={
            'data-related': 'true',
            'data-pos': 0,
            'data-groupname': 'myabcde'
        }),
        'b': AutocompleteSelect("b", attrs={
            'data-related': 'true',
            'data-pos': 1,
            'data-groupname': 'myabcde'
        }),
In your app gtselects.py set the ref_field to indicate what field use to lookup on queryset.
@register_lookups(prefix="b", basename="b")
class BLookup(BaseSelect2View):
    model = models.B
    fields = ['display']
    ref_field = 'a'
Customs Urls
In some cases you need to pass more data to reverse url, by default -list is appended to the base url name, but you can change it for something like -detail and pass some data like pk, ej.
in forms.py
class Meta:
  widgets={
    'comunities': AutocompleteSelectMultiple("comunitybasename",
                    url_suffix='-detail', url_args=[], url_kwargs={'pk': 1}, }),
  }
Note
the reverse url happen on get_context(self, name, value, attrs) method.
There is some cases when you don’t have the values on compilation moment, so you can overwrite extra_url_args and extra_url_kwargs in widget instance before form render
class Myform(GTForm):
    def __init__(self, *args, **kwargs):
        super().__init__(*args, **kwargs)
        self.fields['comunities'].widget.extra_url_kwargs['pk']=1

    class Meta:
        widgets={
          'comunities': AutocompleteSelectMultiple("comunitybasename", url_suffix='-detail'),
        }
Filter based on inputs inside page
It’s posible to use other inputs included on the search criteria, using attr attribute you can inject html data atributes that start with data-s2filter-, next the name of the search criteria esperated on backend like data-s2filter-myinput, the value it has the html selector on the page.
class PeopleGroupForm(CustomForm, forms.ModelForm):
    class Meta:
        model = models.PeopleGroup
        fields = '__all__'
        widgets = {
            'name': TextInput,
            'people': AutocompleteSelectMultiple("personbasename",
                                                 attrs={
                                                     'data-s2filter-myinput': '#id_name'}),
            }
EditorTinymce widget
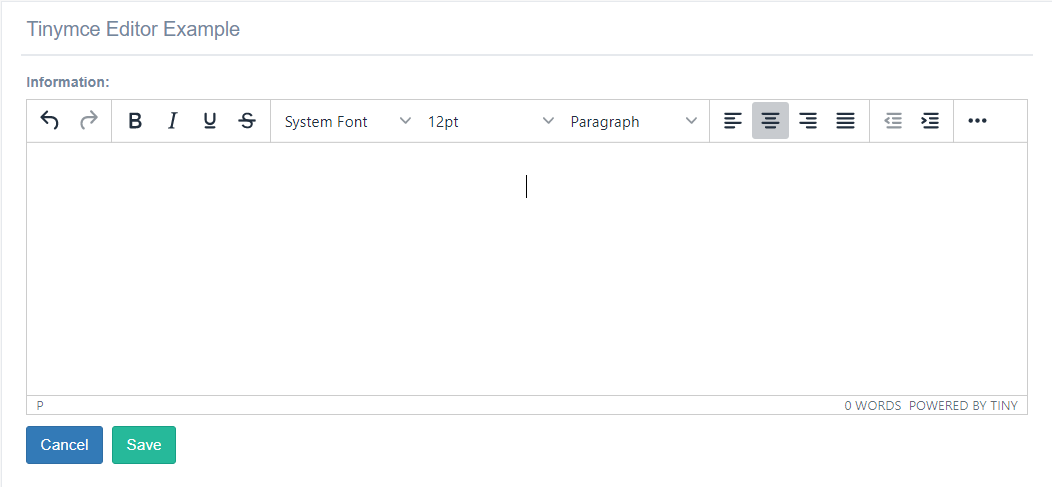
This widget approach used Tinymce-editor js for save in html format the information(text, images, link, tables, videos). You can add this widget only in a TextField.
You need to add in the settings file a attribute with the name Tinymce_UPLOAD_PATH , this field contain a directory to save the upload files.
..code:: python
TINYMCE_UPLOAD_PATH =os.path.join(MEDIA_ROOT, ‘tinymce/’)
Example for use the widget:
from djgentelella.forms.forms import GTForm
from djgentelella.widgets import tinymce as widget

class EditorTinymce(forms.ModelForm,GTForm):

  class Meta():
    model=WysiwygModel
    fields='__all__'
    widgets={
      'information': widget.EditorTinymce,
      'extra_information': widget.EditorTinymce,
    }
- ..note:: To Upload files in the server, you with need to login.
Example to upload images: .. image:: ../_static/uploadImages.gif
YesNoInput widget
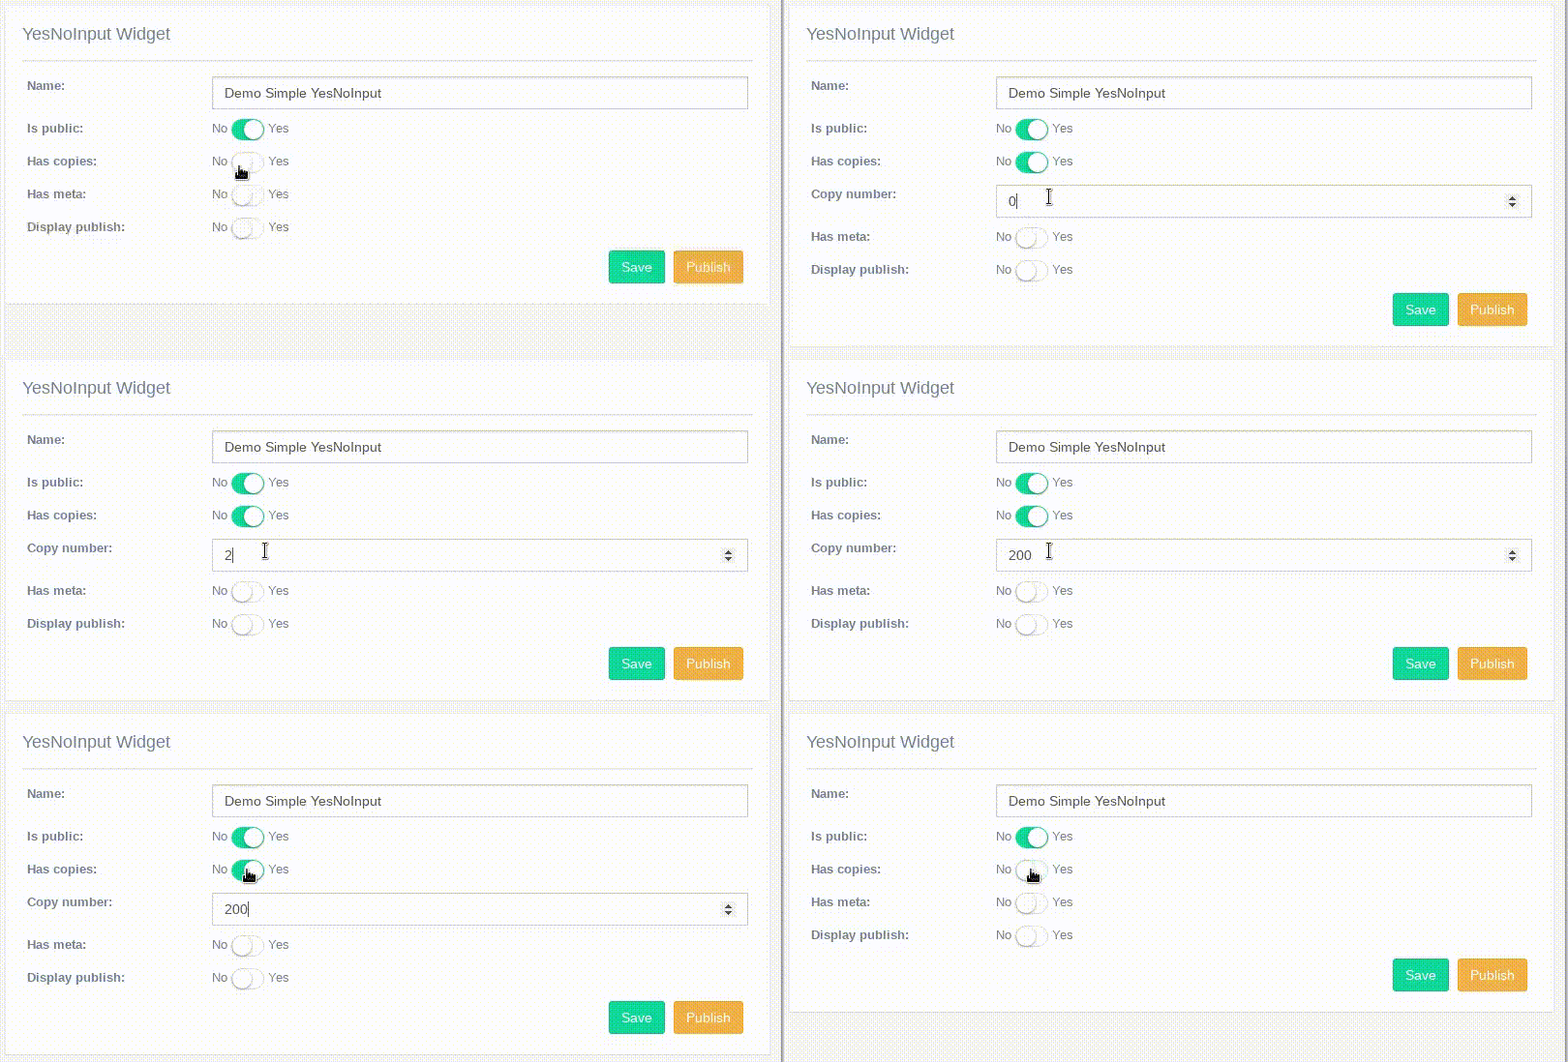
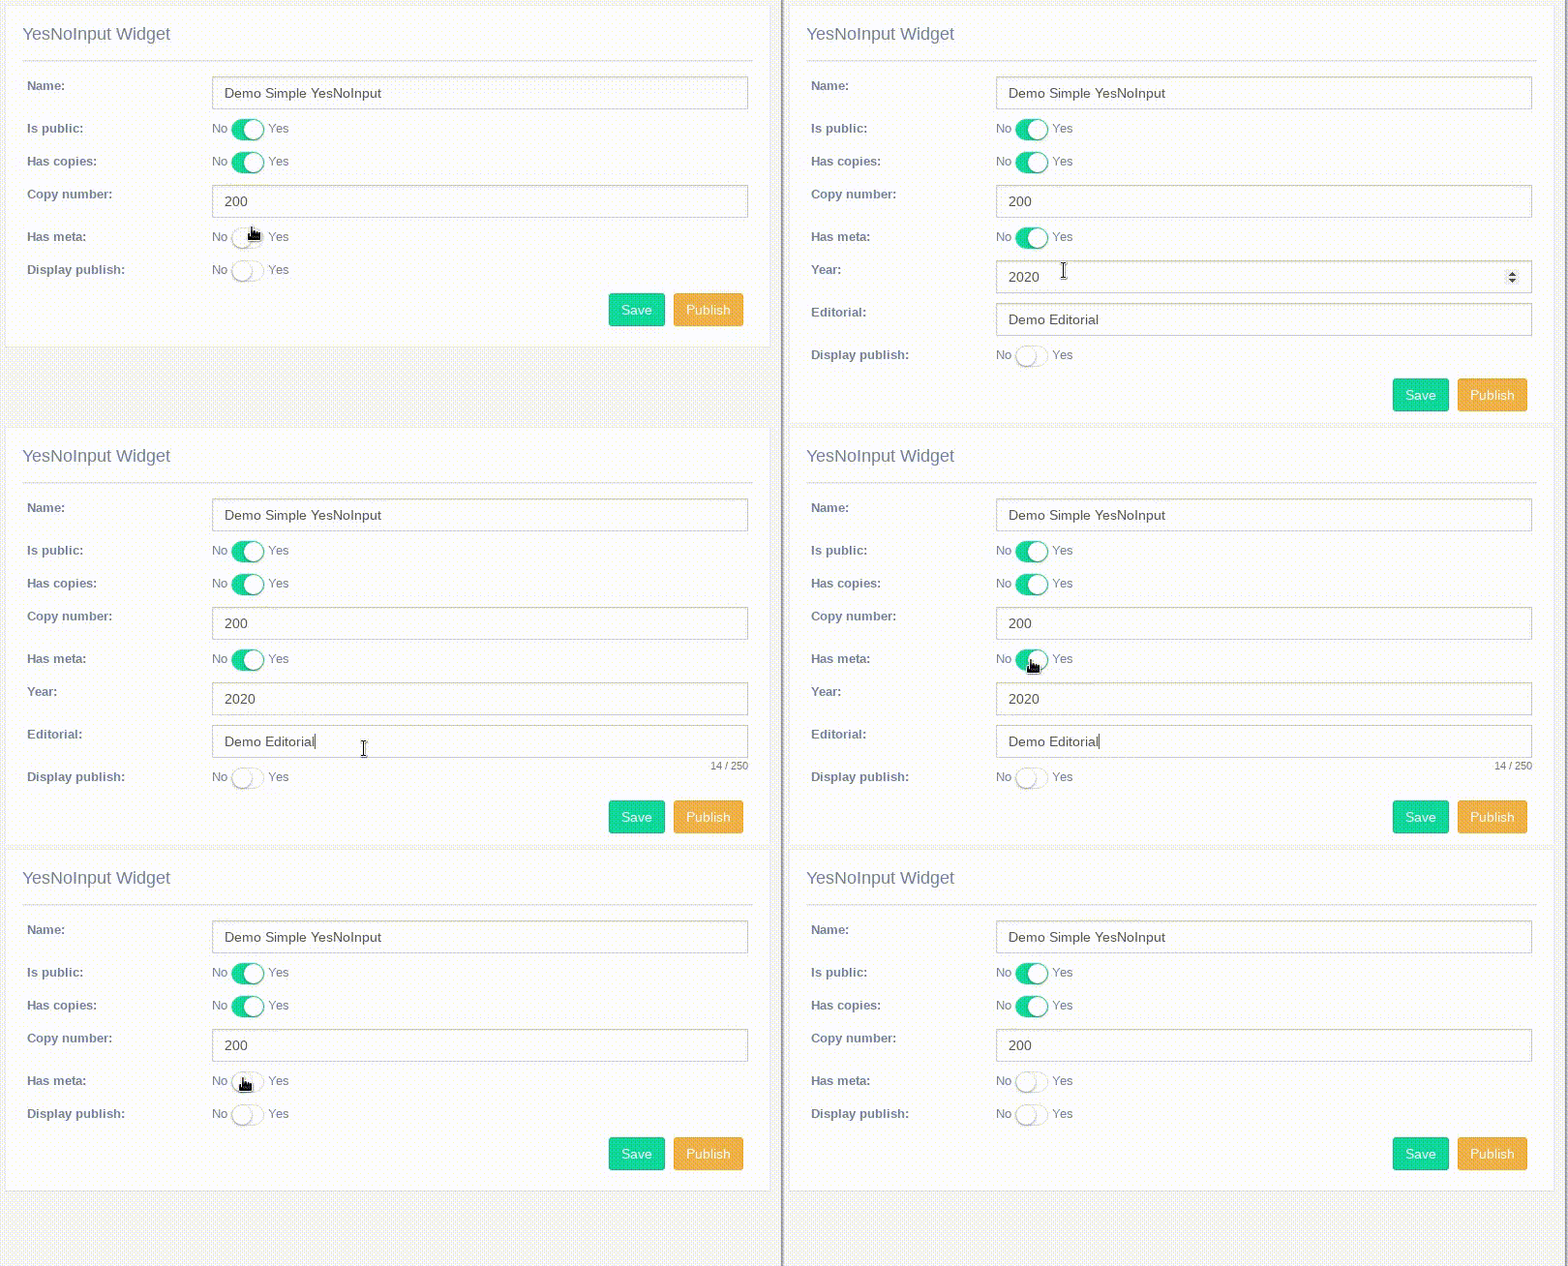
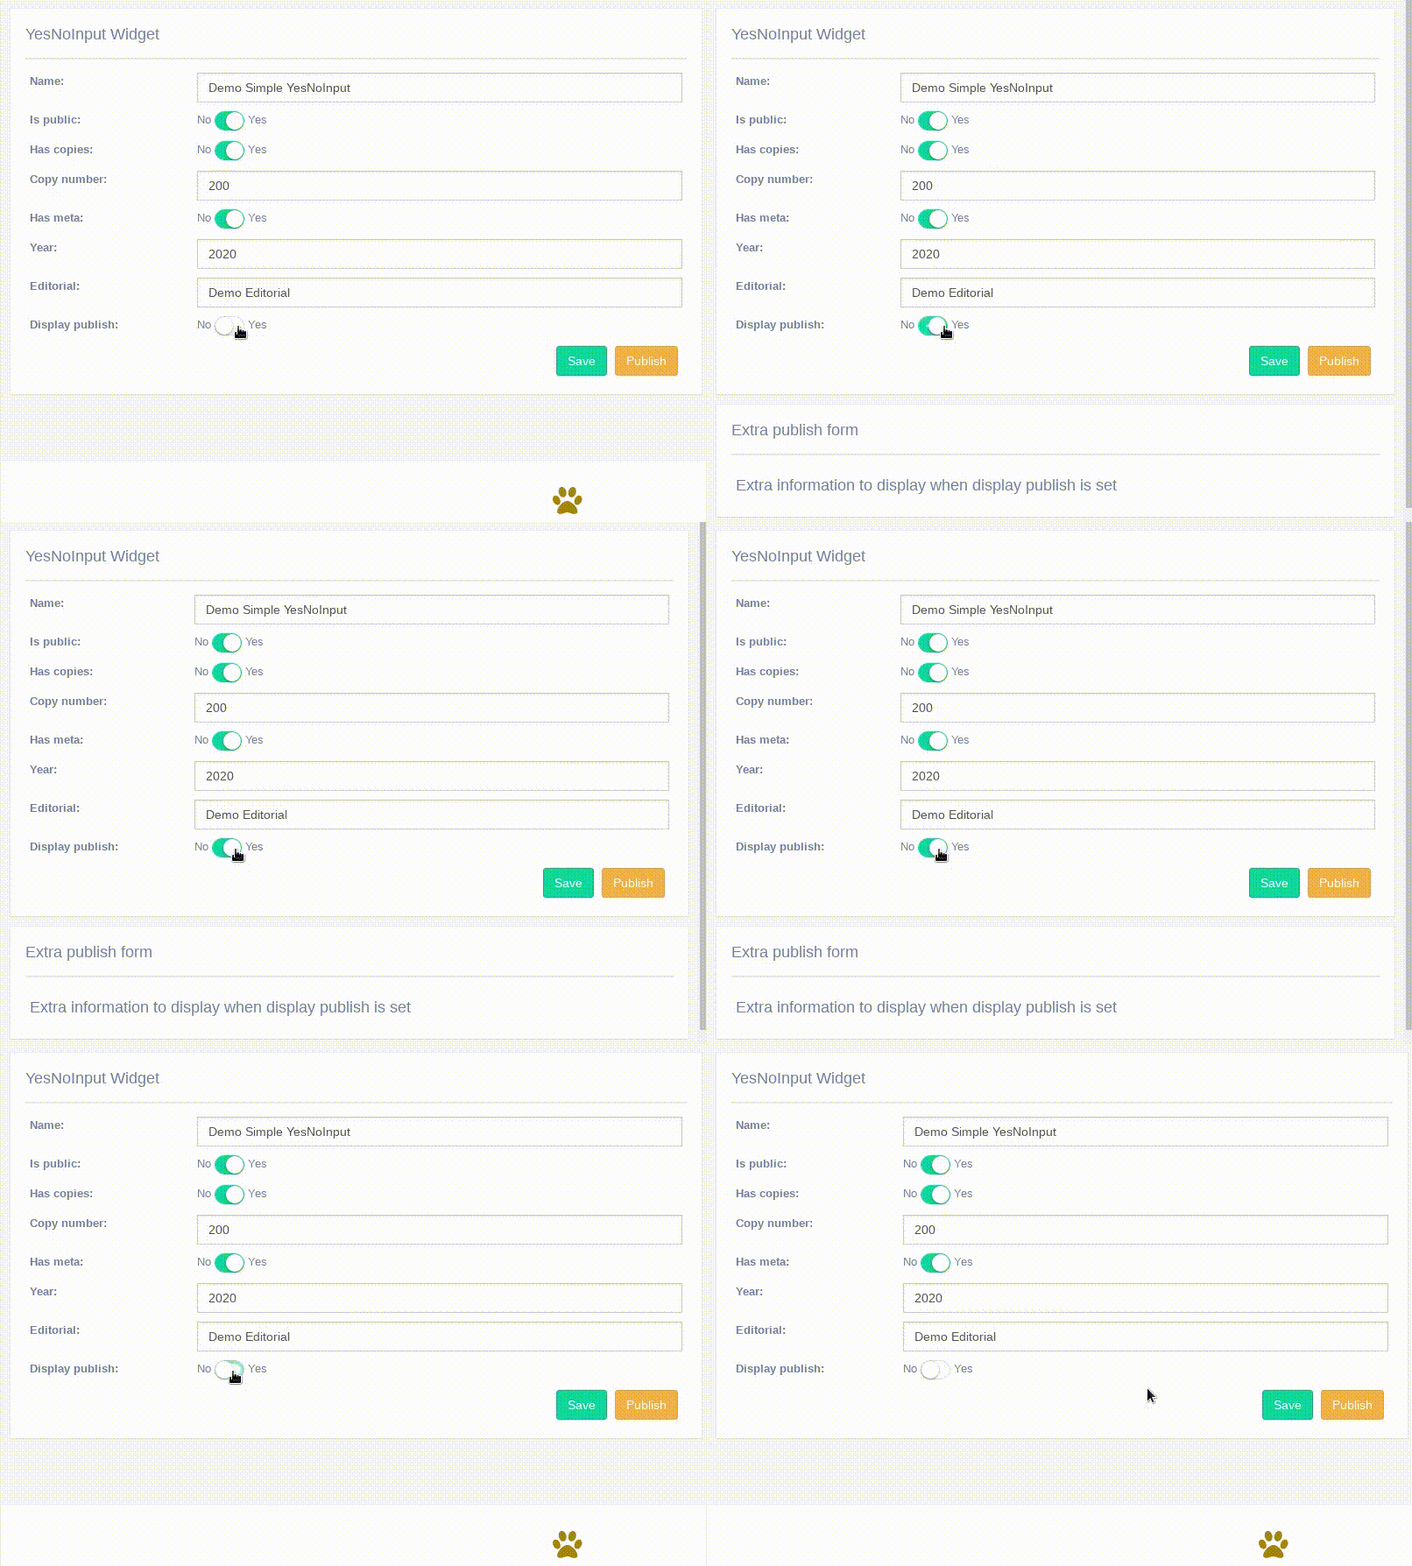
This widget try to implement repetitive configurations in yes/no input options, it can be integrated in its basic behavior with minimal configurations.
Simple YesNoInput
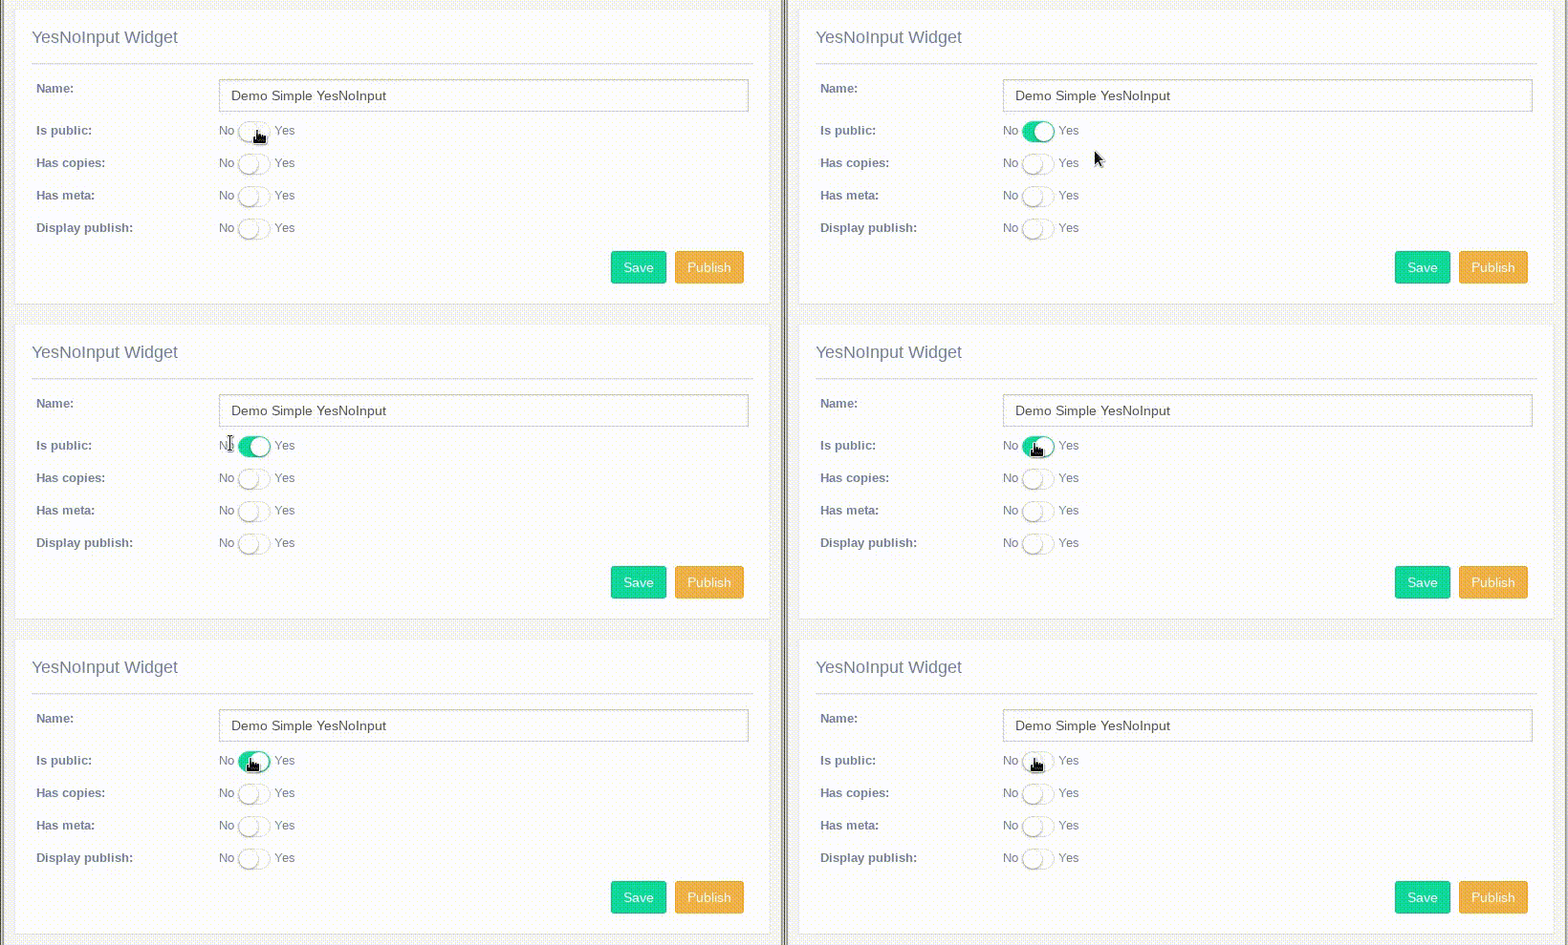
- The basic YesNoInput can be set in two ways:
The easiest in Meta
And creating a field in form.
In Meta class:
from djgentelella.widgets import core as genwidgets
from djgentelella.forms.forms import GTForm
from demoapp import models
class YesNoInputForm(forms.ModelForm, GTForm):
    class Meta:
        model = models.yourmodel
        fields = '__all__'
        widgets = {
            'is_public': genwidgets.YesNoInput
        }
Make sure you model has the is_public field and djgentelella will do the dirty work.
As a Form field:
from djgentelella.widgets import core as genwidgets
from djgentelella.forms.forms import GTForm
from demoapp import models
class YesNoInputForm(forms.ModelForm, GTForm):
    is_public = forms.BooleanField(widget=genwidgets.YesNoInput())
    class Meta:
        model = models.yourmodel
        fields = '__all__'
In this example is_public can be an extra field that is not related with the model class in Meta.
Usage of GridSlider, DateGridSlider and SingleGridSlider Widgets
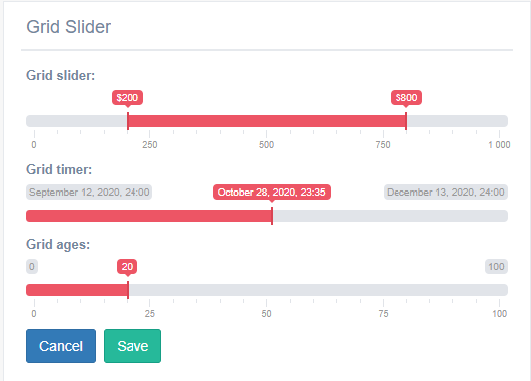
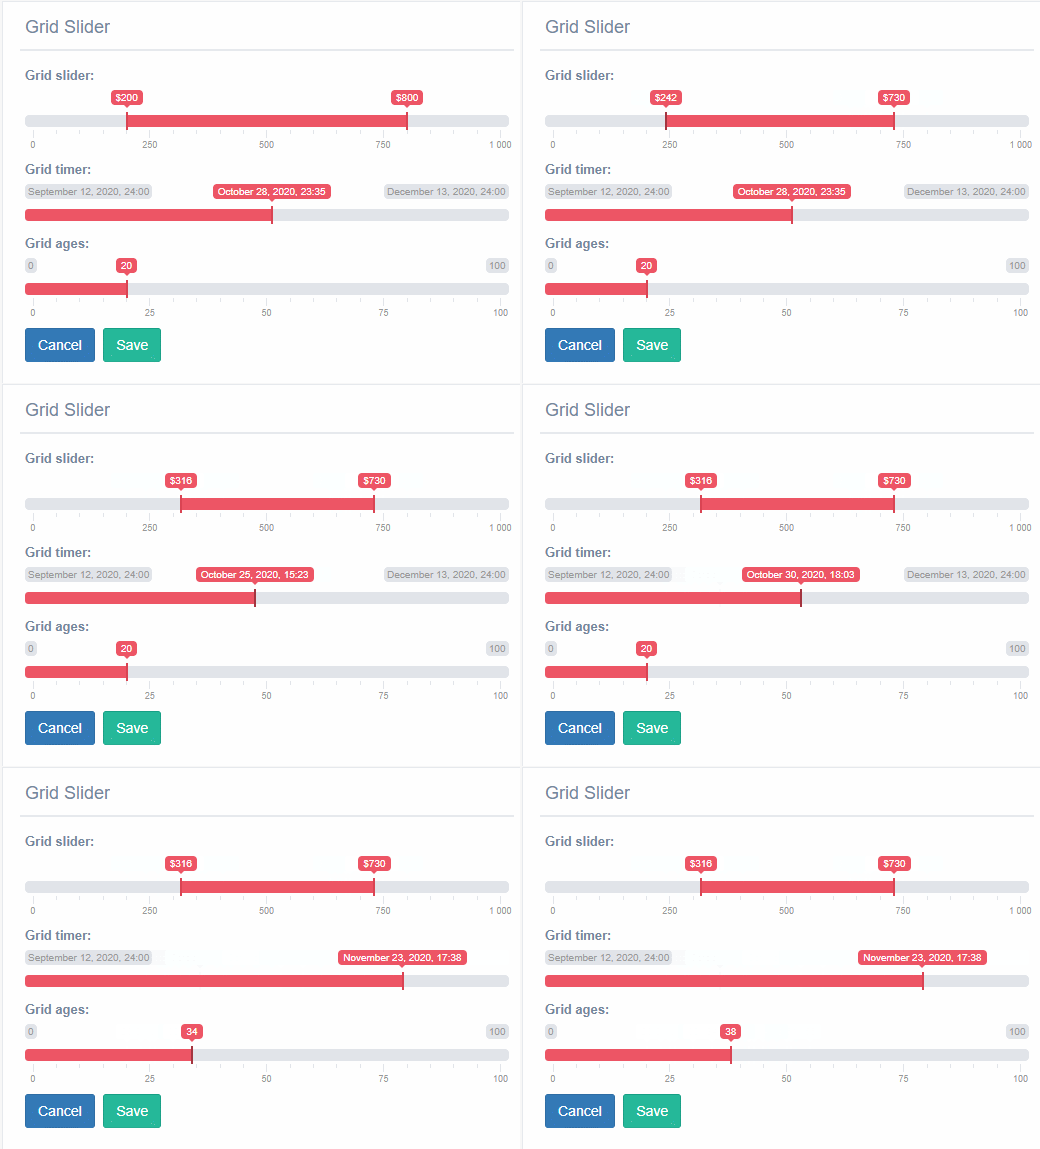
GridSlider It is similar to range input, but this use two pointer represent the min and max value.
SingleGridSlider It is similar to GridSlider, but this only can use a pointer.
DateGridSlider It is similar to SingleGridSlider, but this only receive values type date in format(‘yyyy/mm/dd’).
You can uses this widget in a * CharField , * IntegerField * and *DateTime
How to used it?
You need add in the widget a list with especifics atributes.
- In the GridSlider need to add:
data-min: this atribute receives the min value,in addition can be use with values type integer.
data-max: this atribute receives the max value,in addition can be use with values type integer.
data-step: this atribute receives the step value requerid to reach the maximum or minimum value.
data-grid: this atribute receive true or false value, if the value is true it show a grid under the bar with some step values, but the value is false don’t appear the grid.
data-to_max: this atribute defined the default min value and receive integer or date values.
data-from_min:This defined the default max value and receive integer or date values.
data-from_fixed: this atribute receive true or false value, it function is limit the minimun value for the slider dont move to more that data_to_min atribute.
data-to_fixed:this atribute receive true or false value, it function is limit the maximum value for the slider dont move more that data_to_max atribute
data-prefix: This receive the simbols can use to represent money example: $ and €.
data-hide_min_max:this atribute receive true or false value, it function is appear labels with the min a max value.
data-target_from: this receive the name of one field of the model and that field represent the minimum value of the grid slider.
data-target_to::this receive the name of one field of the model and that field represent the maximum value of the grid slider.
- About the DateGridSlider need to add:
data-min: this atribute receives the min value,in addition can be use with values type date in format (‘YYYY / MM / DD’).
data-max: this atribute receives the max value,in addition can be use with values type date in format (‘YYYY / MM / DD’).
data_from: This defined the default initial value and only date values.
- About the SingleGridSlider need to add:
data-min: this atribute receives the min value,in addition can be use with values type date in format (‘YYYY / MM / DD’).
data-max: this atribute receives the max value,in addition can be use with values type date in format (‘YYYY / MM / DD’).
data_from: This defined the default initial value and only date values.
data-target: this receive the name of one field of the model and that field represent the minimum value of the grid slider.
data-target_from: this atribute receive simbols.
Forms.py
In model based form:
class gridSliderForm(forms.ModelForm, GTForm):
grid_slider = forms.CharField(widget=widget.GridSlider(attrs={'data-min': '0',
                                                              'data-max': '1000',
                                                              'data-step': 2,
                                                              'data-grid': 'true',
                                                              'data-from_fixed': 'false',
                                                              'data-prefix': "$",
                                                              'data-to_fixed': 'false',
                                                              'data-to_max': 750,
                                                              'data-from_min': 200,
                                                              'data-hide_min_max': 'true',
                                                              'data-target-from': 'minimum',
                                                              'data-target-to': 'maximum',
                                                              })
grid_timer = forms.CharField(widget=widget.DateGridSlider(attrs={'data_min': '2020-09-12',
                                                                    'data_max': '2020-12-12',
                                                                    'data_from': '2020-11-12',
                                                                    }))

grid_ages = forms.CharField(widget=widget.SingleGridSlider(attrs={'data-min': '0',
                                                                  'data-max': '100',
                                                                  'data_from': '20',
                                                                  'data-prefix': ' ',
                                                                  'data-target': 'age',
                                                                  }))

class Meta:
    model = models.gridSlider
    fields = '__all__'
    widgets = {
        'minimum': widget.HiddenInput,
        'maximum': widget.HiddenInput,
        'datetime': widget.HiddenInput,
        'age': widget.HiddenInput
    }
As you can see in the previous code you can make the fields of the model can be hidden or any type.
ChunkedUpload widget
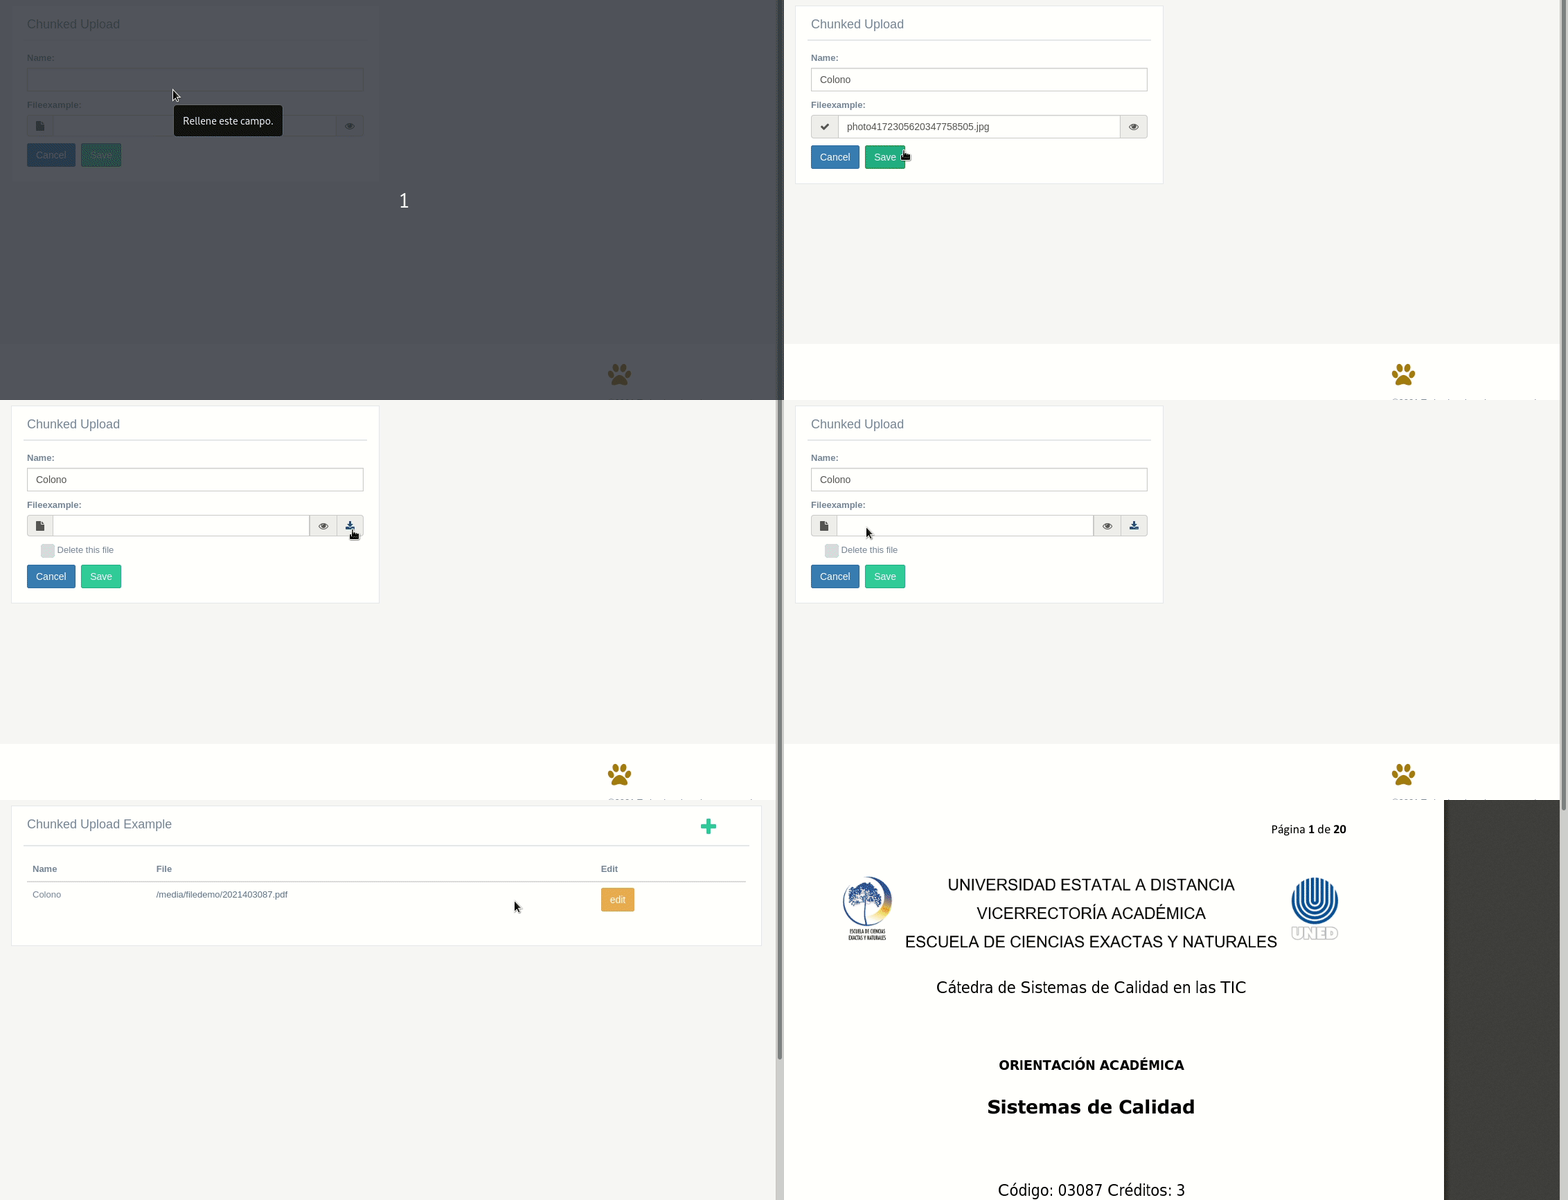
This widget approach used django-chunked-upload app for save the files to the respective directory. You can add this widget only in a FileField.
The widget can be use in the Meta or in a field of the form.
In Meta class:
from djgentelella.widgets.core import TextInput
from djgentelella.widgets.files import FileChunkedUpload
from djgentelella.forms.forms import GTForm

class ChunkedUploadItemForm(GTForm, forms.ModelForm):
    fileexample = forms.FileField(widget=FileChunkedUpload, required=False)
    class Meta:
        model = ChunkedUploadItem
        fields = '__all__'
        widgets = {
            'name': TextInput,
            'fileexample': FileChunkedUpload
        }
As a Form field:
from djgentelella.widgets.core import TextInput
from djgentelella.widgets.files import FileChunkedUpload
from djgentelella.forms.forms import GTForm

class ChunkedUploadItemForm(GTForm, forms.ModelForm):
    fileexample = forms.FileField(widget=FileChunkedUpload, required=False)
    class Meta:
        model = ChunkedUploadItem
        fields = '__all__'
Make sure your model has the fileexample or the name of the field do you using to save file in your model.
StoryMaps Widgets
There are 2 diferent storymap types:
Giga-Pixel StoryMap
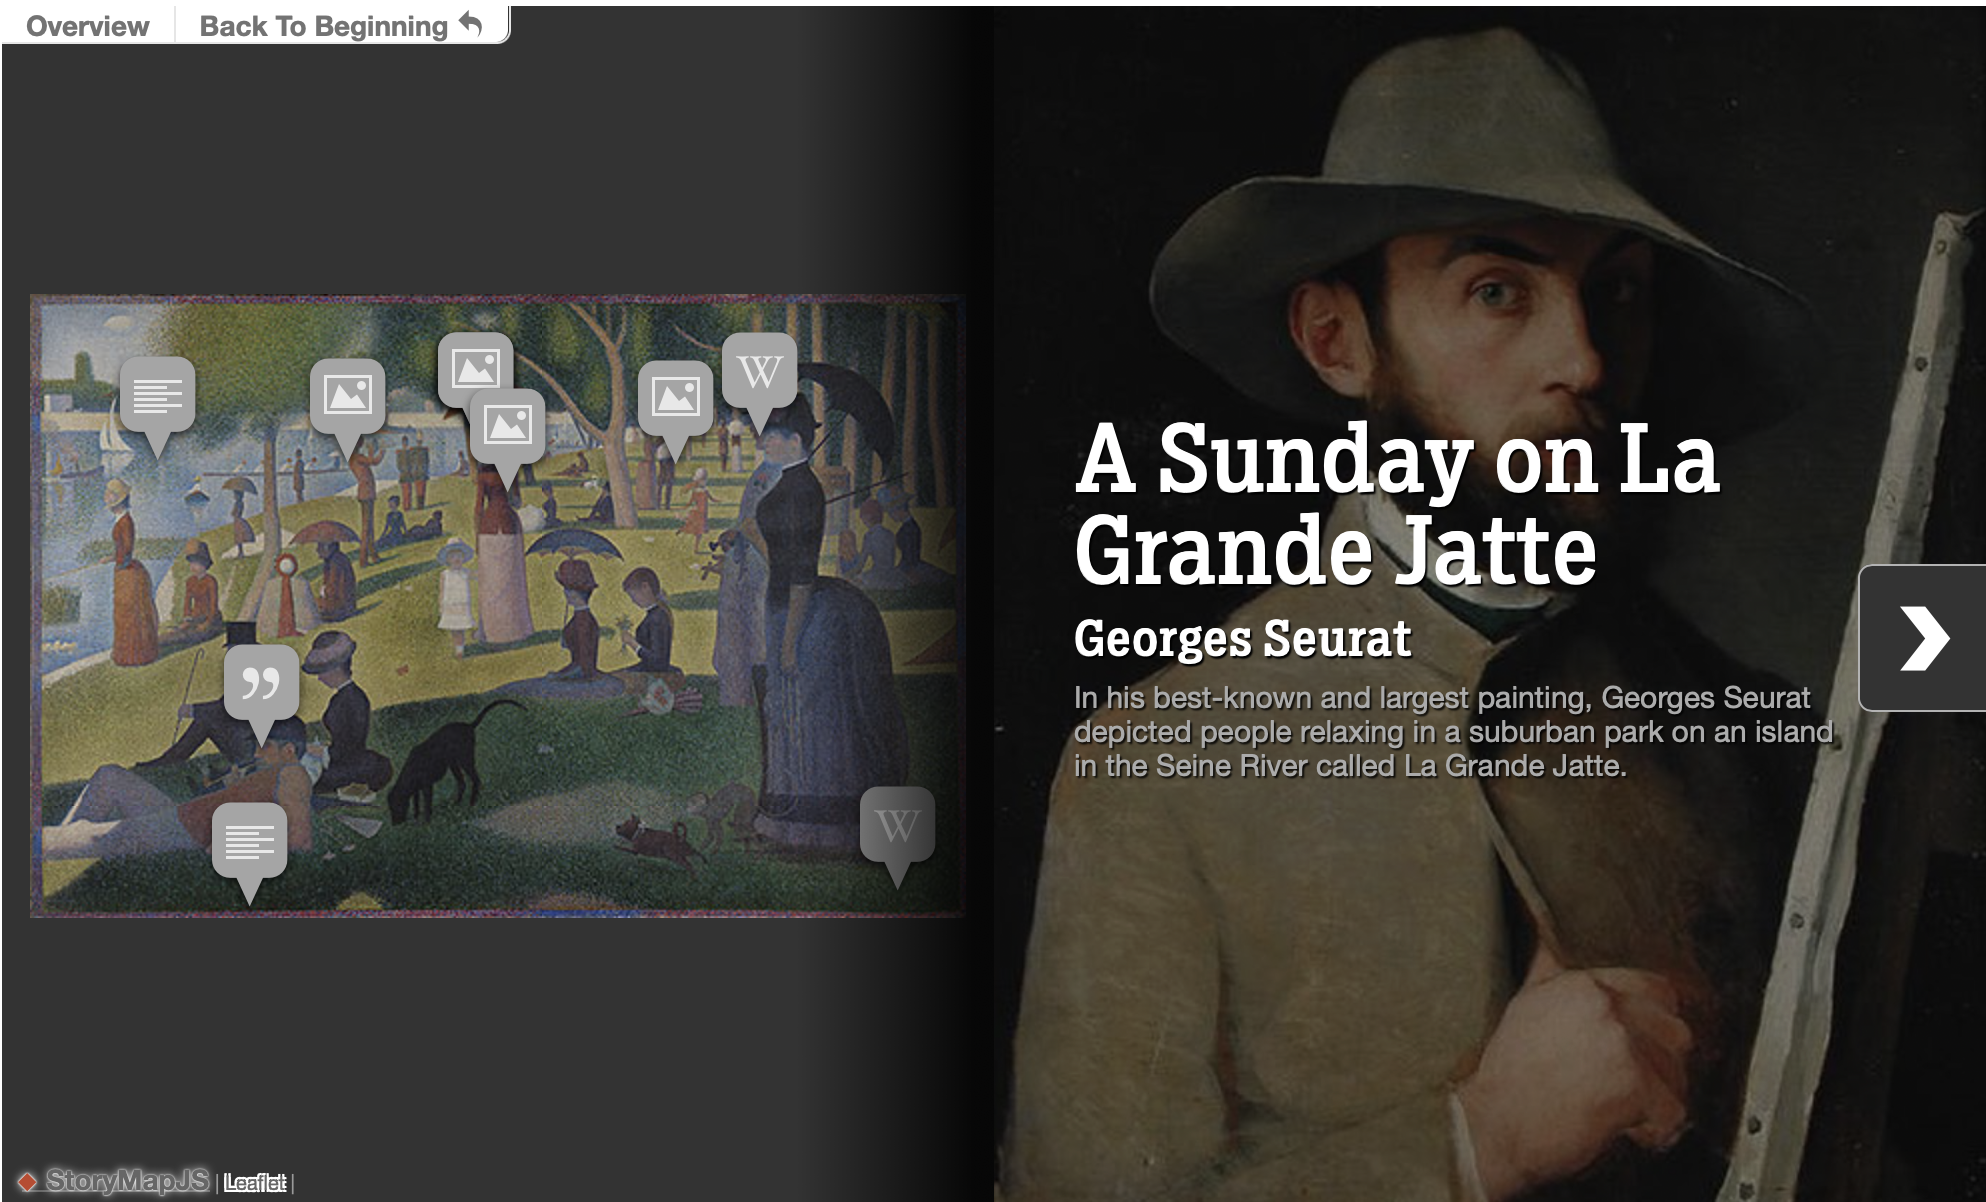
Note
This widget is ReadOnly so no data input is send on form submit.
You must have to:
Create a lookup channel in
app/gtstorymap.pybased in the model we want to use as options in the widget.Replace default widget in form with
GigaPixelStoryMapInput.
Map-Based StoryMap
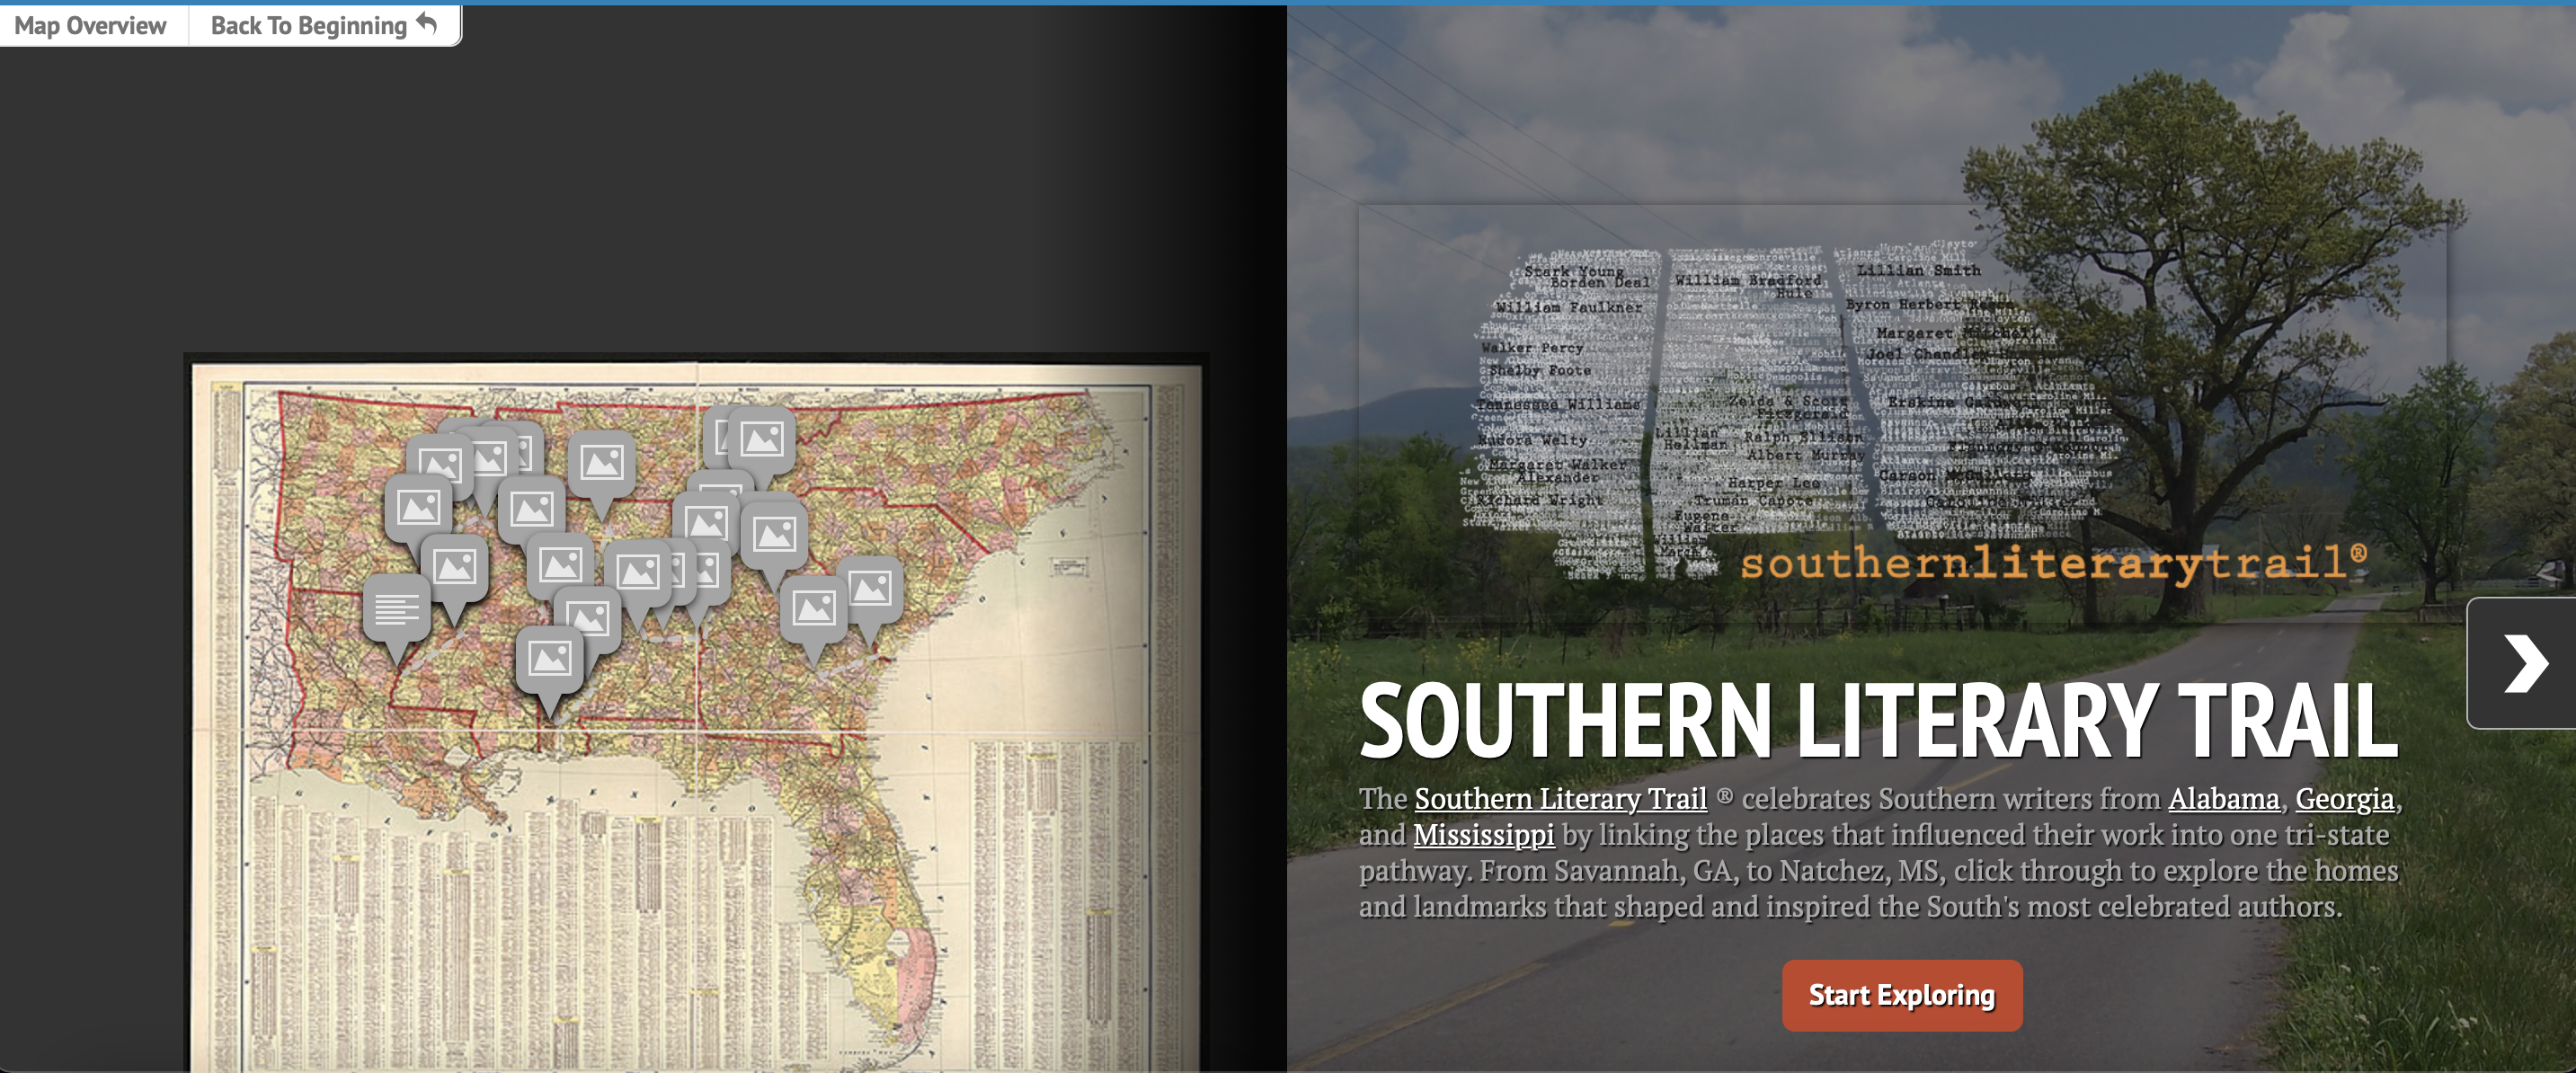
Note
This widget is ReadOnly so no data input is send on form submit.
You must have to:
Create a lookup channel in
app/gtstorymap.pybased in the model we want to use as options in the widget.Replace default widget in form with
MapBasedStoryMapInput.
Usage in forms.py
In model based form:
from djgentelella.widgets.storymap import GigaPixelStoryMapInput
from djgentelella.forms.forms import GTForm
from django.urls import reverse_lazy
class ExampleForm(GTForm, forms.ModelForm):
    timeline = forms.CharField(widget=GigaPixelStoryMapInput(
            attrs={"data-url": reverse_lazy('examplestorymapgp-list'),
                "storymap_options": gigapixel_storymap_options
            }), required=False)
    class Meta:
        model = models.MyModel
        fields = '__all__'
- As noticed in above example, the last steps are:
Create a CharField with widget as GigaPixelStoryMapInput add data-url including the basename plus -list.
Se field as required = False
You can set initial data with form(initial={}) changing the data-url attribute when value is not None on the field.
More see: https://storymap.knightlab.com/advanced/#json-syntax
Note
Static files for this widget are not loaded by default so you need to load CSS and JS for this widget to prevent.
You can define what library you want using define_true tag, in this way:
{% load gtsettings %}
{% block pre_head %}
    {% define_true  "use_readonlywidgets" %}
{% endblock %}
or set on setting.py the follow dict to load always all static
DEFAULT_JS_IMPORTS = {
    'use_readonlywidgets': True
}
Calendar Widget
Calendar widget to display and interact with events.

Note
This widget is ReadOnly so no data input is send on form submit.
The widget has these three parameters:
attrs: Dict withe the attributes of the HTML element of the widget.
calendar_attrs: Dict with the settings the calendar object.
events: List of objects with the events proper data to render in the calendar.
Usage in forms.py
In model based form:
from djgentelella.widgets.calendar import CalendarInput
from djgentelella.forms.forms import GTForm
class PeopleLineForm(GTForm, forms.ModelForm):
    calendar = forms.CharField(
        widget=CalendarInput(
            required=False,
            calendar_attrs={'initialView': 'listWeek'},
            events=Event.objects.all().values()
        )
    )
    class Meta:
        model = models.MyModel
        fields = '__all__'
As noticed in above example, you can create a model with the event fields and pass a queryset as the events parameter, you need to apply the values() function to pass it as a list of dictionaries.
In the future, the calendar will be able to return a list of events on form submit.
All the calendar settings and events API can be found in https://fullcalendar.io/docs
Note
Static files for this widget are not loaded by default so you need to load CSS and JS for this widget to prevent.
You can define what library you want using define_true tag, in this way:
{% load gtsettings %}
{% block pre_head %}
    {% define_true  "use_readonlywidgets" %}
{% endblock %}
or set on setting.py the follow dict to load always all static
DEFAULT_JS_IMPORTS = {
    'use_readonlywidgets': True
}
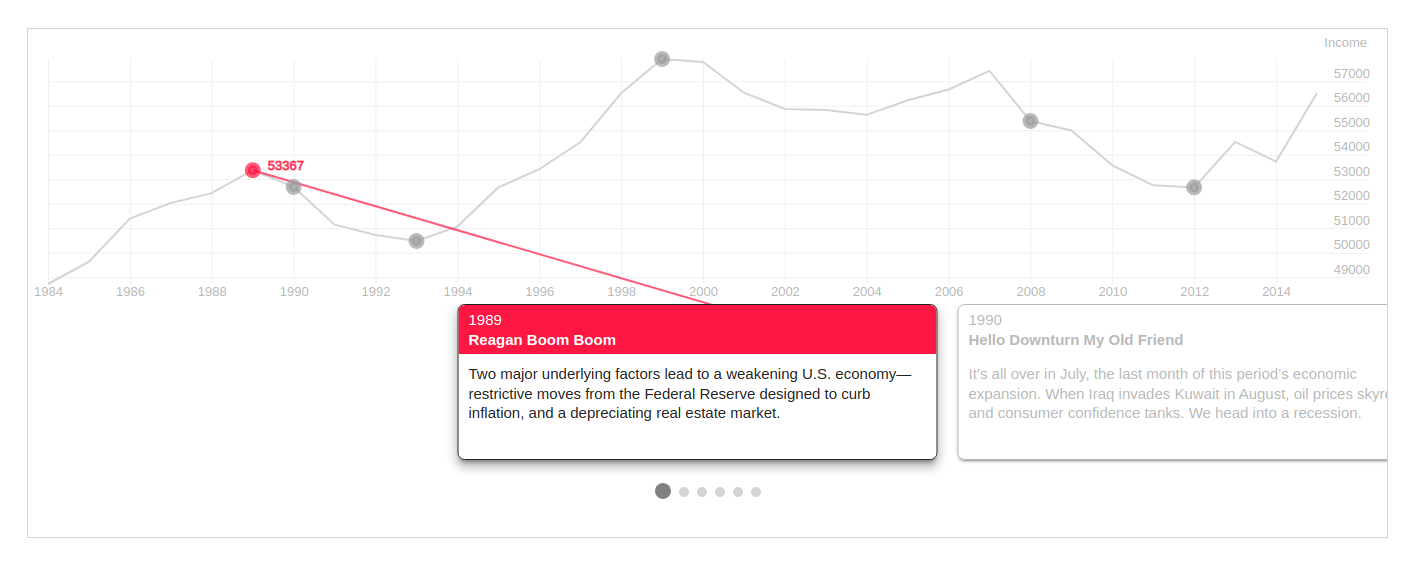
Storyline Widget
Note
This widget is ReadOnly so no data input is send on form submit.
2 requirements must be achieved to use these widgets
Create a lookup channel in
app/gtstoryline.pybased in the model we want to use as options in the widget.Replace default widget in form with
UrlStoryLineInput.
Defining Lookups for usage in widgets
An example on how a lookup must be defined:
import datetime
from djgentelella.groute import register_lookups
from djgentelella.views.storyline import StorylineBuilder

@register_lookups(prefix="storyline", basename="examplestoryline")
class StorylineExample(StorylineBuilder):

    def create_options(self):
        pass
    def create_csv(self):
        return []
Based in above example we need:
- A decorator named register_lookups defined above the lookup class that receives two parameters:
A prefix, which is basically the model name in lowcaps
A basename, which is a meaningful name that will help you differentiate between multiple lookups
A class that inherits from the custom class StorylineBuilder which is responsible of creating an url that exposes the model data in a way the widget urderstands it, so to make it works the class needs to overwrite the methods.
Details on the methods override:
- Create options: This method should return a dictionary containing the storyline settings, with the following characteristics:
- a “data” dictionary containing three obligatory fields:
datetime_column_name: a case and space sensitive string that is the value in the first row of the column containing the dates for the X-coordinates of the chart.
datetime_format: a string that tells StorylineJS how to interpret the value in your datetime_column. The format should be as specified with [d3-time-format](https://github.com/d3/d3-time-format/blob/master/README.md#locale_format)
data_column_name: a a case and space sensitive string that is the value in the first row of the column of your file which has the values to be used for the Y-coordinates of the chart.
- a “chart” object with the following keys:
datetime_format: a string telling StorylineJS how to display dates, used mostly for the X-axis labels, but also used for cards if no display_date is specified. The format should be as specified with [d3-time-format](https://github.com/d3/d3-time-format/blob/master/README.md#locale_format)
y_axis_label (optional): Use this to indicate the units for the Y values in your chart. If this is left out, then data.data_column_name will be used.
- a “slider” dictionary that contains the following attributes:
start_at_card: A string defining at which card you want the slider to be positioned when first rendered,
title_column_name: The exact title of the column with the titles information,
text_column_name: The exact name of the column with the texts information,
- Create csv: this method should return a list of strings, where the first string contains the datetime-column name, the data-column name, the title column name and the text column name (they should match with the information assigned in the options object.
CSV format should be separated by commas, and the quantity of columns of the data cannot surpass the columns in the header row (the first one)
It could have less columns than the header, nonetheless needs at least the first two, containing datetime and data information, otherwise will fail.
Usage in forms.py
In model based form:
from djgentelella.widgets.storyline import UrlStoryLineInput
from djgentelella.forms.forms import GTForm
from django.urls import reverse_lazy
class PeopleLineForm(GTForm, forms.ModelForm):
    storyline = forms.CharField(widget=UrlStoryLineInput(
            attrs={"data-url": reverse_lazy('examplestoryline-list'),
                    "height: 500, "width": 600",
                     "data-url_name": 'examplestoryline'
            }))
    class Meta:
        model = models.MyModel
        fields = '__all__'
- As noticed in above example, the last steps are:
Create a CharField with widget as UrlStoryLineInput add data-url including the basename plus -list.
It is mandatory to also send “height” and “width” in the attributes, as well as a “data-url_name” field with the exact basename. (used internally to redirection).
You can set initial data with form(initial={}) changing the data-url attribute when value is not None on the field.
In the example data-url_name the prefix data- is used to indicate data Html element, and url_name is the attribute name.
Note
Static files for this widget are not loaded by default so you need to load CSS and JS for this widget to prevent.
You can define what library you want using define_true tag, in this way:
{% load gtsettings %}
{% block pre_head %}
    {% define_true  "use_readonlywidgets" %}
{% endblock %}
or set on setting.py the follow dict to load always all static
DEFAULT_JS_IMPORTS = {
    'use_readonlywidgets': True
}
