Advanced Widgets
This section covers specialized widgets that provide enhanced functionality beyond basic form inputs.
Core Input Widgets
These are the fundamental input widgets that replace Django’s default form inputs with Bootstrap 5 styled versions.
TextInput
A styled text input field with Bootstrap form-control class.
from djgentelella.widgets import core as genwidgets
from djgentelella.forms.forms import GTForm

class MyForm(GTForm, forms.ModelForm):
    class Meta:
        model = MyModel
        fields = ['name', 'title']
        widgets = {
            'name': genwidgets.TextInput,
            'title': genwidgets.TextInput(attrs={
                'placeholder': 'Enter title here',
                'maxlength': 100
            }),
        }
You can pass any HTML attributes via the attrs parameter.
NumberInput
A numeric input with HTML5 validation for integer values.
from djgentelella.widgets import core as genwidgets

class ProductForm(GTForm, forms.ModelForm):
    class Meta:
        model = Product
        fields = ['quantity', 'price']
        widgets = {
            'quantity': genwidgets.NumberInput,
            'price': genwidgets.NumberInput(attrs={
                'min': 0,
                'max': 10000,
                'step': 1
            }),
        }
FloatInput
A numeric input configured for decimal values with step of 0.1 by default.
from djgentelella.widgets import core as genwidgets

class MeasurementForm(GTForm, forms.ModelForm):
    class Meta:
        model = Measurement
        fields = ['weight', 'temperature']
        widgets = {
            'weight': genwidgets.FloatInput,
            'temperature': genwidgets.FloatInput(attrs={
                'step': '0.01',
                'min': '-273.15'
            }),
        }
EmailInput
An email input with HTML5 email validation.
from djgentelella.widgets import core as genwidgets

class ContactForm(GTForm, forms.Form):
    email = forms.EmailField(widget=genwidgets.EmailInput)
    secondary_email = forms.EmailField(
        widget=genwidgets.EmailInput(attrs={
            'placeholder': 'backup@example.com'
        }),
        required=False
    )
URLInput
A URL input with https:// placeholder by default.
from djgentelella.widgets import core as genwidgets

class WebsiteForm(GTForm, forms.ModelForm):
    class Meta:
        model = Website
        fields = ['homepage', 'social_link']
        widgets = {
            'homepage': genwidgets.URLInput,
            'social_link': genwidgets.URLInput(attrs={
                'placeholder': 'https://twitter.com/username'
            }),
        }
PasswordInput
A password input that masks the entered text.
from djgentelella.widgets import core as genwidgets

class RegistrationForm(GTForm, forms.Form):
    password = forms.CharField(widget=genwidgets.PasswordInput)
    confirm_password = forms.CharField(
        widget=genwidgets.PasswordInput(attrs={
            'autocomplete': 'new-password'
        })
    )
ColorInput
An HTML5 color picker widget.
from djgentelella.widgets import core as genwidgets

class ThemeForm(GTForm, forms.ModelForm):
    class Meta:
        model = Theme
        fields = ['primary_color', 'secondary_color']
        widgets = {
            'primary_color': genwidgets.ColorInput,
            'secondary_color': genwidgets.ColorInput(attrs={
                'value': '#3498db'
            }),
        }
Textarea
A resizable text area with Bootstrap styling.
from djgentelella.widgets import core as genwidgets

class ArticleForm(GTForm, forms.ModelForm):
    class Meta:
        model = Article
        fields = ['title', 'content', 'summary']
        widgets = {
            'title': genwidgets.TextInput,
            'content': genwidgets.Textarea,
            'summary': genwidgets.Textarea(attrs={
                'rows': 5,
                'placeholder': 'Brief summary of the article...'
            }),
        }
By default, the textarea has 3 rows and is resizable.
Select Widgets
Select widgets provide enhanced dropdown and selection functionality using Select2 and Bootstrap styling.
Select
A Select2-powered dropdown with autocomplete search.
from djgentelella.widgets import core as genwidgets
from djgentelella.forms.forms import GTForm

class PersonForm(GTForm, forms.ModelForm):
    class Meta:
        model = Person
        fields = ['country', 'status']
        widgets = {
            'country': genwidgets.Select,
            'status': genwidgets.Select(attrs={
                'data-placeholder': 'Select a status...'
            }),
        }
For static choices:
class SettingsForm(GTForm, forms.Form):
    priority = forms.ChoiceField(
        choices=[('low', 'Low'), ('medium', 'Medium'), ('high', 'High')],
        widget=genwidgets.Select
    )
SelectMultiple
A multi-select dropdown allowing multiple selections.
from djgentelella.widgets import core as genwidgets

class ProjectForm(GTForm, forms.ModelForm):
    class Meta:
        model = Project
        fields = ['name', 'tags', 'members']
        widgets = {
            'name': genwidgets.TextInput,
            'tags': genwidgets.SelectMultiple,
            'members': genwidgets.SelectMultiple(attrs={
                'data-placeholder': 'Select team members...'
            }),
        }
SelectWithAdd
A select dropdown with an “Add New” button to create new options inline.
from djgentelella.widgets import core as genwidgets

class DocumentForm(GTForm, forms.ModelForm):
    class Meta:
        model = Document
        fields = ['title', 'category']
        widgets = {
            'title': genwidgets.TextInput,
            'category': genwidgets.SelectWithAdd(attrs={
                'add_url': '/categories/create/'  # URL to create new category
            }),
        }
Note
The add_url attribute is required and should point to a view that handles creating new options.
SelectMultipleAdd
A multi-select with “Add New” functionality.
from djgentelella.widgets import core as genwidgets

class ArticleForm(GTForm, forms.ModelForm):
    class Meta:
        model = Article
        fields = ['title', 'tags']
        widgets = {
            'title': genwidgets.TextInput,
            'tags': genwidgets.SelectMultipleAdd(attrs={
                'add_url': '/tags/create/'
            }),
        }
RadioHorizontalSelect
Displays choices as horizontal radio buttons.
from djgentelella.widgets import core as genwidgets

class SurveyForm(GTForm, forms.Form):
    rating = forms.ChoiceField(
        choices=[('1', 'Poor'), ('2', 'Fair'), ('3', 'Good'),
                 ('4', 'Very Good'), ('5', 'Excellent')],
        widget=genwidgets.RadioHorizontalSelect
    )

    gender = forms.ChoiceField(
        choices=[('M', 'Male'), ('F', 'Female'), ('O', 'Other')],
        widget=genwidgets.RadioHorizontalSelect
    )
RadioVerticalSelect
Displays choices as vertical radio buttons (one per line).
from djgentelella.widgets import core as genwidgets

class PreferencesForm(GTForm, forms.Form):
    notification_frequency = forms.ChoiceField(
        choices=[
            ('immediate', 'Immediately'),
            ('daily', 'Daily digest'),
            ('weekly', 'Weekly summary'),
            ('never', 'Never')
        ],
        widget=genwidgets.RadioVerticalSelect
    )
You can also use the alias RadioSelect which defaults to horizontal layout:
from djgentelella.widgets import core as genwidgets

class OptionsForm(GTForm, forms.Form):
    choice = forms.ChoiceField(
        choices=[('a', 'Option A'), ('b', 'Option B')],
        widget=genwidgets.RadioSelect  # Same as RadioHorizontalSelect
    )
NullBooleanSelect
A three-state selection for nullable boolean fields (Unknown, Yes, No).
from djgentelella.widgets import core as genwidgets

class ReviewForm(GTForm, forms.ModelForm):
    class Meta:
        model = Review
        fields = ['approved', 'featured']
        widgets = {
            'approved': genwidgets.NullBooleanSelect,
            'featured': genwidgets.NullBooleanSelect,
        }
Custom labels can be provided:
class CustomNullBooleanForm(GTForm, forms.Form):
    verified = forms.NullBooleanField(
        widget=genwidgets.NullBooleanSelect(choices=[
            ('unknown', 'Pending Review'),
            ('true', 'Verified'),
            ('false', 'Rejected'),
        ])
    )
CheckboxInput
A styled checkbox using Gentelella’s flat checkbox style.
from djgentelella.widgets import core as genwidgets

class TermsForm(GTForm, forms.Form):
    accept_terms = forms.BooleanField(
        widget=genwidgets.CheckboxInput,
        label='I accept the terms and conditions'
    )
    subscribe_newsletter = forms.BooleanField(
        widget=genwidgets.CheckboxInput,
        required=False,
        label='Subscribe to newsletter'
    )
CheckboxSelectMultiple
Multiple checkboxes for selecting several options from a list.
from djgentelella.widgets import core as genwidgets

class InterestsForm(GTForm, forms.Form):
    interests = forms.MultipleChoiceField(
        choices=[
            ('tech', 'Technology'),
            ('sports', 'Sports'),
            ('music', 'Music'),
            ('art', 'Art'),
            ('travel', 'Travel')
        ],
        widget=genwidgets.CheckboxSelectMultiple
    )

# For ModelForm with ManyToMany fields
class UserProfileForm(GTForm, forms.ModelForm):
    class Meta:
        model = UserProfile
        fields = ['user', 'skills']
        widgets = {
            'skills': genwidgets.CheckboxSelectMultiple,
        }
Using Select2 Inside Modals
When using Select widgets inside Bootstrap modals, you need to specify the modal container to avoid dropdown display issues:
class ModalForm(GTForm, forms.ModelForm):
    class Meta:
        model = MyModel
        fields = ['category', 'tags']
        widgets = {
            'category': genwidgets.Select(attrs={
                'data-dropdownparent': '#myModal'
            }),
            'tags': genwidgets.SelectMultiple(attrs={
                'data-dropdownparent': '#myModal'
            }),
        }
In your template:
<div id="myModal" class="modal" tabindex="-1">
    <div class="modal-dialog">
        <div class="modal-content">
            <div class="modal-body">
                {{ form.as_horizontal }}
            </div>
        </div>
    </div>
</div>
Date and Time Widgets
Widgets for selecting dates, times, and date ranges with JavaScript-powered pickers.
Note
For DateInput and DateTimeInput to work correctly, configure your Django settings:
USE_L10N = False

DATE_INPUT_FORMATS = ['%Y-%m-%d', '%d/%m/%Y', '%d/%m/%y']
DATETIME_INPUT_FORMATS = ['%m/%d/%Y %H:%M %p']
TIME_INPUT_FORMATS = ['%H:%M', '%H:%M:%S']
DateInput
A date picker widget with calendar popup.
from djgentelella.widgets import core as genwidgets
from djgentelella.forms.forms import GTForm

class EventForm(GTForm, forms.ModelForm):
    class Meta:
        model = Event
        fields = ['name', 'event_date', 'deadline']
        widgets = {
            'name': genwidgets.TextInput,
            'event_date': genwidgets.DateInput,
            'deadline': genwidgets.DateInput,
        }
The date format is automatically converted from Django’s DATE_INPUT_FORMATS setting to the JavaScript picker format.
DateTimeInput
A combined date and time picker widget.
from djgentelella.widgets import core as genwidgets

class MeetingForm(GTForm, forms.ModelForm):
    class Meta:
        model = Meeting
        fields = ['title', 'start_time', 'end_time']
        widgets = {
            'title': genwidgets.TextInput,
            'start_time': genwidgets.DateTimeInput,
            'end_time': genwidgets.DateTimeInput,
        }
TimeInput
A time-only picker widget.
from djgentelella.widgets import core as genwidgets

class ScheduleForm(GTForm, forms.ModelForm):
    class Meta:
        model = Schedule
        fields = ['name', 'opening_time', 'closing_time']
        widgets = {
            'name': genwidgets.TextInput,
            'opening_time': genwidgets.TimeInput,
            'closing_time': genwidgets.TimeInput,
        }
SplitDateTimeWidget
Separate date and time inputs displayed side by side.
from djgentelella.widgets import core as genwidgets

class AppointmentForm(GTForm, forms.Form):
    appointment = forms.SplitDateTimeField(
        widget=genwidgets.SplitDateTimeWidget
    )
SelectDateWidget
Three dropdown selects for day, month, and year.
from djgentelella.widgets import core as genwidgets

class BirthdayForm(GTForm, forms.Form):
    birth_date = forms.DateField(
        widget=genwidgets.SelectDateWidget
    )
DateRangeInput
A calendar for selecting a range between two dates. Use with CharField or TextField.

from djgentelella.widgets import core as genwidgets

class ReportForm(GTForm, forms.ModelForm):
    class Meta:
        model = Report
        fields = ['name', 'date_range']
        widgets = {
            'name': genwidgets.TextInput,
            'date_range': genwidgets.DateRangeInput,
        }

# Or with a Form
class FilterForm(GTForm, forms.Form):
    period = forms.CharField(widget=genwidgets.DateRangeInput)
The value is stored as a string in the format "start_date - end_date".
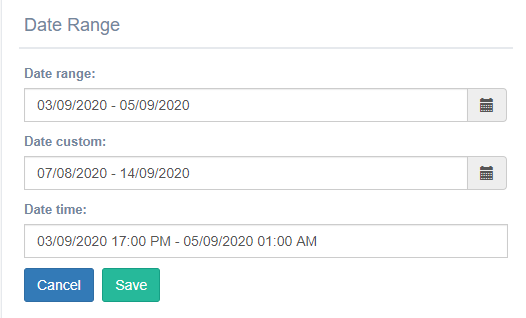
DateRangeInputCustom
A date range picker with preset options: Last 7 days, Next Week, Last 30 days, This month, Last month, and Custom Range.
from djgentelella.widgets import core as genwidgets

class AnalyticsForm(GTForm, forms.Form):
    period = forms.CharField(widget=genwidgets.DateRangeInputCustom)
DateRangeTimeInput
A date range picker that also includes time selection.
from djgentelella.widgets import core as genwidgets

class BookingForm(GTForm, forms.ModelForm):
    class Meta:
        model = Booking
        fields = ['room', 'reservation_period']
        widgets = {
            'room': genwidgets.Select,
            'reservation_period': genwidgets.DateRangeTimeInput,
        }
DateMaskInput
A date input with input masking to guide the user’s input format.
from djgentelella.widgets import core as genwidgets

class SimpleForm(GTForm, forms.Form):
    birth_date = forms.DateField(widget=genwidgets.DateMaskInput)
DateTimeMaskInput
A datetime input with input masking.
from djgentelella.widgets import core as genwidgets

class LogForm(GTForm, forms.Form):
    log_time = forms.DateTimeField(widget=genwidgets.DateTimeMaskInput)
Complete Example
Here’s a comprehensive example using multiple date/time widgets:
from django import forms
from djgentelella.widgets import core as genwidgets
from djgentelella.forms.forms import GTForm

class EventScheduleForm(GTForm, forms.Form):
    # Single date selection
    event_date = forms.DateField(
        widget=genwidgets.DateInput,
        label='Event Date'
    )

    # Date and time selection
    start_datetime = forms.DateTimeField(
        widget=genwidgets.DateTimeInput,
        label='Start Date & Time'
    )

    # Time only
    check_in_time = forms.TimeField(
        widget=genwidgets.TimeInput,
        label='Check-in Time'
    )

    # Date range for multi-day events
    event_duration = forms.CharField(
        widget=genwidgets.DateRangeInput,
        label='Event Duration'
    )

    # Predefined date range options
    report_period = forms.CharField(
        widget=genwidgets.DateRangeInputCustom,
        label='Report Period'
    )

    # Date range with time
    booking_window = forms.CharField(
        widget=genwidgets.DateRangeTimeInput,
        label='Booking Window'
    )
File Upload Widgets
Widgets for handling file uploads, including standard uploads, chunked uploads for large files, and media recording.
FileInput
A styled file input with chunked upload support for handling files of any size.
from djgentelella.widgets import core as genwidgets
from djgentelella.forms.forms import GTForm

class DocumentForm(GTForm, forms.ModelForm):
    class Meta:
        model = Document
        fields = ['name', 'file']
        widgets = {
            'name': genwidgets.TextInput,
            'file': genwidgets.FileInput,
        }
The FileInput widget automatically handles chunked uploads using the built-in upload endpoints.
ClearableFileInput
A file input that shows the current file and provides a checkbox to clear it.
from djgentelella.widgets import core as genwidgets

class ProfileForm(GTForm, forms.ModelForm):
    class Meta:
        model = Profile
        fields = ['name', 'avatar']
        widgets = {
            'name': genwidgets.TextInput,
            'avatar': genwidgets.ClearableFileInput,
        }
FileChunkedUpload
A specialized widget for uploading large files with progress tracking and resume capability.
Setup Required:
Install the chunked upload URLs in your project:
# urls.py
from djgentelella.urls import urlpatterns as djgentelellaurls

urlpatterns = djgentelellaurls + [
    # your urls...
]
Run migrations to create the ChunkedUpload model:
python manage.py migrate
Usage:
from djgentelella.widgets.files import FileChunkedUpload
from djgentelella.forms.forms import GTForm

class LargeFileForm(GTForm, forms.ModelForm):
    class Meta:
        model = LargeFile
        fields = ['name', 'file']
        widgets = {
            'name': genwidgets.TextInput,
            'file': FileChunkedUpload,
        }

# Or as a standalone field
class UploadForm(GTForm, forms.Form):
    document = forms.FileField(
        widget=FileChunkedUpload,
        required=False
    )
The widget handles:
Large file uploads by splitting into chunks
Upload progress indication
Automatic retry on network errors
Cleanup of temporary files after completion
Media Recording Widgets
These widgets allow users to record media directly from their device’s camera or microphone.
ImageRecordInput
Capture images using the device camera.
from djgentelella.widgets import core as genwidgets
from djgentelella.forms.forms import GTForm

class PhotoForm(GTForm, forms.Form):
    photo = forms.FileField(
        widget=genwidgets.ImageRecordInput,
        label='Take a photo'
    )

    # With custom preview dimensions
    profile_photo = forms.FileField(
        widget=genwidgets.ImageRecordInput(attrs={
            'data-width': '200px',
            'data-height': '200px'
        }),
        label='Profile Photo'
    )
VideoRecordInput
Record video using the device camera.
from djgentelella.widgets import core as genwidgets

class VideoForm(GTForm, forms.Form):
    video = forms.FileField(
        widget=genwidgets.VideoRecordInput,
        label='Record a video'
    )

    # With custom preview dimensions
    presentation = forms.FileField(
        widget=genwidgets.VideoRecordInput(attrs={
            'data-width': '640px',
            'data-height': '480px'
        }),
        label='Record Presentation'
    )
Note
Video size depends on the camera’s default configuration.
AudioRecordInput
Record audio using the device microphone.
from djgentelella.widgets import core as genwidgets

class AudioForm(GTForm, forms.Form):
    audio = forms.FileField(
        widget=genwidgets.AudioRecordInput,
        label='Record audio message'
    )

    voice_note = forms.FileField(
        widget=genwidgets.AudioRecordInput,
        label='Voice Note',
        required=False
    )
Complete Media Upload Example
A form combining different file and media upload widgets:
from django import forms
from djgentelella.widgets import core as genwidgets
from djgentelella.widgets.files import FileChunkedUpload
from djgentelella.forms.forms import GTForm

class MediaUploadForm(GTForm, forms.Form):
    # Standard file upload
    document = forms.FileField(
        widget=genwidgets.FileInput,
        label='Upload Document'
    )

    # Large file with chunked upload
    large_file = forms.FileField(
        widget=FileChunkedUpload,
        label='Upload Large File',
        required=False
    )

    # Camera photo capture
    photo = forms.FileField(
        widget=genwidgets.ImageRecordInput(attrs={
            'data-width': '320px',
            'data-height': '240px'
        }),
        label='Take Photo',
        required=False
    )

    # Video recording
    video = forms.FileField(
        widget=genwidgets.VideoRecordInput(attrs={
            'data-width': '640px',
            'data-height': '480px'
        }),
        label='Record Video',
        required=False
    )

    # Audio recording
    audio = forms.FileField(
        widget=genwidgets.AudioRecordInput,
        label='Record Audio',
        required=False
    )
Handling Uploaded Files
In your view, handle the uploaded files as you would with standard Django file uploads:
def upload_view(request):
    if request.method == 'POST':
        form = MediaUploadForm(request.POST, request.FILES)
        if form.is_valid():
            # Access uploaded files
            document = form.cleaned_data['document']
            photo = form.cleaned_data.get('photo')
            video = form.cleaned_data.get('video')
            audio = form.cleaned_data.get('audio')

            # Save files as needed
            if document:
                handle_uploaded_file(document)

            return redirect('success')
    else:
        form = MediaUploadForm()

    return render(request, 'upload.html', {'form': form})
Note
Media recording widgets require:
HTTPS connection (browsers require secure context for camera/microphone access)
User permission to access camera/microphone
Modern browser with MediaRecorder API support
Masked Input Widgets
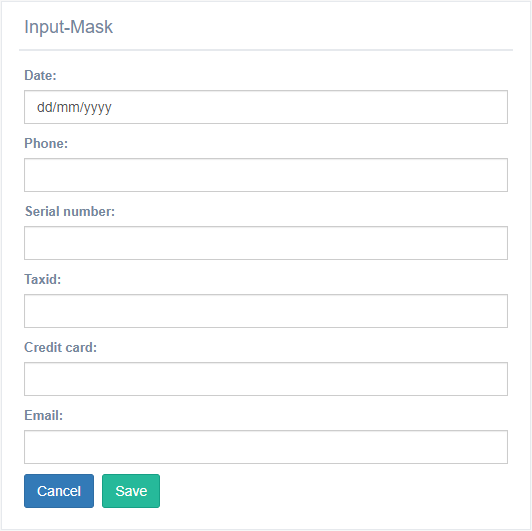
Input mask widgets guide users to enter data in specific formats by displaying a mask pattern and validating input as they type.
EmailMaskInput
An email input with masking that guides users to enter valid email addresses.
from djgentelella.widgets import core as genwidgets
from djgentelella.forms.forms import GTForm

class ContactForm(GTForm, forms.Form):
    email = forms.EmailField(widget=genwidgets.EmailMaskInput)

class UserForm(GTForm, forms.ModelForm):
    class Meta:
        model = User
        fields = ['username', 'email']
        widgets = {
            'username': genwidgets.TextInput,
            'email': genwidgets.EmailMaskInput,
        }
PhoneNumberMaskInput
A phone number input with formatting mask.
from djgentelella.widgets import core as genwidgets

class CustomerForm(GTForm, forms.ModelForm):
    class Meta:
        model = Customer
        fields = ['name', 'phone']
        widgets = {
            'name': genwidgets.TextInput,
            'phone': genwidgets.PhoneNumberMaskInput,
        }
PhoneNumberTwoDigitMaskInput
An alternative phone number format with two-digit area code.
from djgentelella.widgets import core as genwidgets

class ContactInfoForm(GTForm, forms.Form):
    phone = forms.CharField(widget=genwidgets.PhoneNumberTwoDigitMaskInput)
DateMaskInput
A date input with format masking (e.g., DD/MM/YYYY).
from djgentelella.widgets import core as genwidgets

class EventForm(GTForm, forms.Form):
    event_date = forms.DateField(widget=genwidgets.DateMaskInput)
DateTimeMaskInput
A datetime input with format masking.
from djgentelella.widgets import core as genwidgets

class ScheduleForm(GTForm, forms.Form):
    scheduled_time = forms.DateTimeField(widget=genwidgets.DateTimeMaskInput)
SerialNumberMaskInput
An input formatted for serial numbers.
from djgentelella.widgets import core as genwidgets

class ProductForm(GTForm, forms.ModelForm):
    class Meta:
        model = Product
        fields = ['name', 'serial_number']
        widgets = {
            'name': genwidgets.TextInput,
            'serial_number': genwidgets.SerialNumberMaskInput,
        }
TaxIDMaskInput
An input formatted for tax identification numbers.
from djgentelella.widgets import core as genwidgets

class CompanyForm(GTForm, forms.ModelForm):
    class Meta:
        model = Company
        fields = ['name', 'tax_id']
        widgets = {
            'name': genwidgets.TextInput,
            'tax_id': genwidgets.TaxIDMaskInput,
        }
CreditCardMaskInput
An input formatted for credit card numbers with automatic spacing.
from djgentelella.widgets import core as genwidgets

class PaymentForm(GTForm, forms.Form):
    card_number = forms.CharField(
        widget=genwidgets.CreditCardMaskInput,
        label='Credit Card Number'
    )
Complete Example
A form demonstrating all masked input widgets:
from django import forms
from djgentelella.widgets import core as genwidgets
from djgentelella.forms.forms import GTForm

class InputMaskForm(GTForm, forms.ModelForm):
    class Meta:
        model = InputMaskModel
        fields = '__all__'
        widgets = {
            'phone': genwidgets.PhoneNumberMaskInput,
            'date': genwidgets.DateMaskInput,
            'serial_number': genwidgets.SerialNumberMaskInput,
            'taxid': genwidgets.TaxIDMaskInput,
            'credit_card': genwidgets.CreditCardMaskInput,
            'email': genwidgets.EmailMaskInput,
        }
This form provides guided input for all common masked data types.
Tagging Widget
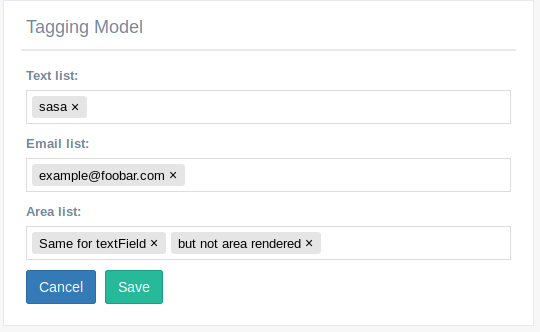
This widget approach used tagify js for make CharField and Textfield taggiable, all data are saved separated by comma
Example of use:
from djgentelella.forms.forms import GTForm
from djgentelella.widgets.tagging import TaggingInput, EmailTaggingInput
class TaggingForm(GTForm, forms.ModelForm):
    class Meta:
        model = TaggingModel
        fields = '__all__'
        widgets = {
        'text_list': TaggingInput,
        'email_list':  EmailTaggingInput,
        'area_list': TaggingInput
        }
EmailTaggingInput allow only tag emails, so they make a validation on GUI.
Note
No email validation are made on server side.
NumberKnobInput widget
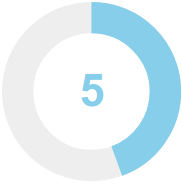
It is a kind of selector to input numerical values. You can add this widget in a IntegerField or FloatField.
from djgentelella.forms.forms import GTForm
class FooModelForm(GTForm, forms.ModelForm):
    class Meta:
        model = Foo
        fields = (
            'number_of_eyes',
            'speed_in_miles_per_hour',
            'age'
        )

    widgets = {
         'number_of_eyes': knobwidget.NumberKnobInput(attrs={}),
         'speed_in_miles_per_hour': knobwidget.NumberKnobInput(
                                         attrs={
                                             "data-min": 1,
                                             "data-step": 0.1,
                                             "data-max": 50
                                         }),
         'age': knobwidget.NumberKnobInput()
    }
As you can see in the previous code you can add min, max values as also a step increment.
Color widget
How to implement it??
After add ‘djgentelella’ to INSTALLED_APPS variable in the settings file, you will be able to use this widget.
You can add this widget in the input field of a form in the following way:
from djgentelella.widgets.color import StyleColorInput, DefaultColorInput, HorizontalBarColorInput, VerticalBarColorInput, InlinePickerColor
from djgentelella.forms.forms import GTForm
class ColorWidgetsForm(GTForm, forms.ModelForm):
    defaultColorInput = forms.CharField(widget=DefaultColorInput)
    styleColorInput = forms.CharField(widget=StyleColorInput(attrs={"value": "#0014bb", "id": "c2"}))

    class Meta:
        model = Colors
        fields = "__all__"
        widgets = {
            "horizontalBarColorInput": HorizontalBarColorInput,
            "verticalBarColorInput": VerticalBarColorInput(attrs={"value": "#0014bb", "id": "c4"}),
        }
As you can see, you can pass default attributes in attrs kwarg param of the function like value and id. The color can be remembered after refresh the page.
Exist four types of color widget: DefaultColorInput, StyleColorInput, HorizontalBarColorInput, VerticalBarColorInput
InputMask widget
It is a kind of mask to input date, email and text values. You can uses this widget in a DateField, CharField , EmailField
from djgentelella.forms.forms import GTForm
from djgentelella.widgets import core as widget
class InputMaskForms(forms.ModelForm, GTForm):
    class Meta:
        model = models.InputMask
        fields = '__all__'
        widgets = {
            'phone': widget.PhoneNumberMaskInput,
            'date': widget.DateMaskInput,
            'serial_number': widget.SerialNumberMaskInput,
            'taxid': widget.TaxIDMaskInput,
            'credit_card': widget.CreditCardMaskInput,
            'email': widget.EmailMaskInput,
        }
Exist six types of InputMask widget: PhoneNumberMaskInput, DateMaskInput, SerialNumberMaskInput, TaxIDMaskInput,CreditCardMaskInput,EmailMaskInput
TimeLine Widget
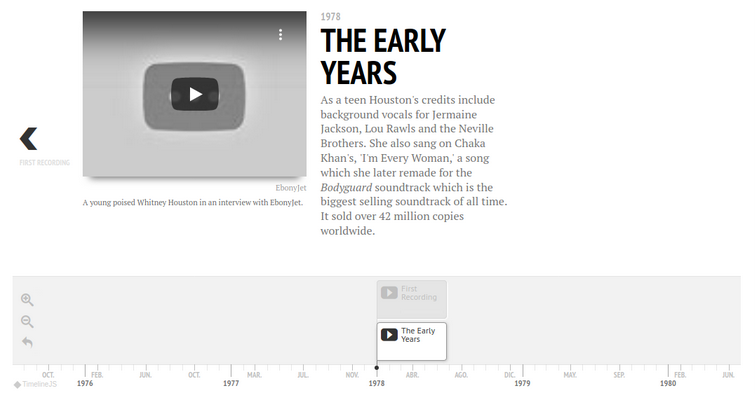
Note
This widget is ReadOnly so no data input is send on form submit.
2 requirements must be achieved to use these widgets
Create a lookup channel in
app/gttimeline.pybased in the model we want to use as options in the widget.Replace default widget in form with
UrlTimeLineInput.
Defining Lookups for usage in widgets
An example on how a lookup must be defined:
import datetime
from djgentelella.groute import register_lookups
from djgentelella.views.timeline import BaseTimelineView

@register_lookups(prefix="timeline", basename="exampletimeline")
class TimelineExample(BaseTimelineView):
    def get_title(self):
        pass
    def get_events(self):
        return []
    def get_scale(self):
        return 'human'
    def get_eras(self):
        return []
Based in above example we need:
- A decorator named register_lookups defined above the lookup class that receives two parameters:
A prefix, which is basically the model name in lowcaps
A basename, which is a meaningful name that will help you differentiate between multiple lookups
A class that inherits from the custom class BaseTimelineView which is responsible of creating an url that exposes the model data in a way the widget urderstands it, so to make it works the class needs overwrite the methods.
More see https://timeline.knightlab.com/docs/json-format.html#json-slide
Usage in forms.py
In model based form:
from djgentelella.widgets.timeline import UrlTimeLineInput
from djgentelella.forms.forms import GTForm
from django.urls import reverse_lazy
class PeopleLineForm(GTForm, forms.ModelForm):
    timeline = forms.CharField(widget=UrlTimeLineInput(
            attrs={"data-url": reverse_lazy('exampletimeline-list'),
                    'style': "height: 500px;",
                     "data-option_language": 'es'
            }), required=False)
    class Meta:
        model = models.MyModel
        fields = '__all__'
- As noticed in above example, the last steps are:
Create a CharField with widget as UrlTimeLineInput add data-url including the basename plus -list.
Se field as required = False
You can set initial data with form(initial={}) changing the data-url attribute when value is not None on the field.
Passing options to timelineJS3
You can pass timelineJS3 options using data attrs in widget attr parameter.
In the example data-option_language the prefix data- is used to indicate data Html element, the section option\_ is used to indicate that this attribute is a
timeline option and language is the option name.
More see: https://timeline.knightlab.com/docs/options.html
Note
Static files for this widget are not loaded by default so you need to load CSS and JS for this widget to prevent.
You can define what library you want using define_true tag, in this way:
{% load gtsettings %}
{% block pre_head %}
    {% define_true  "use_readonlywidgets" %}
{% endblock %}
or set on setting.py the follow dict to load always all static
DEFAULT_JS_IMPORTS = {
    'use_readonlywidgets': True
}
AutoCompleteSelect and AutocompleteSelectMultiple widgets
2 requirements must be achieved to use these widgets
Create a lookup channel in
app/gtselects.pybased in the model we want to use as options in the widget.Replace default widget in form with
AutocompleteSelectorAutocompleteSelectMultiple.
Defining Lookups for usage in widgets
An example on how a lookup must be defined:
from djgentelella.groute import register_lookups
from djgentelella.views.select2autocomplete import BaseSelect2View
from yourapp.models import models

@register_lookups(prefix="person", basename="personbasename")
class PersonGModelLookup(BaseSelect2View):
    model = models.Person
    fields = ['name']
Based in above example we need:
- A decorator named register_lookups defined above the lookup class that receives two parameters:
A prefix, which is basically the model name in lowcaps
A basename, which is a meaningful name that will help you differentiate between multiple lookups
- A class that inherits from the custom class BaseSelect2View which is responsible of creating an url that exposes the model data in a way the widget urderstands it, so to make it works the class needs:
A model to work with.
A list of fields from the model that the inherited class will use as filtering options when returning data to the widget.
If a more customized class is desired the next options can be overwritten to achieve it:
ref_field: can be used to select a specific field from the model with a list behavior (manytomanyfield or fields with choices) and use it to filter options.
ref_name: combined with ref_field, this field receives a list of strings that will be evaluated if any of its elements is contained in the ref_field field.
text_separator: if provided, the class will use it to generate a list separated with the given value from result data.
text_wrapper: if provided, the class will wrap each element of the result query with the value given.
order_by: if provided, the class will used the given field to order the result query, the default field is the model pk.
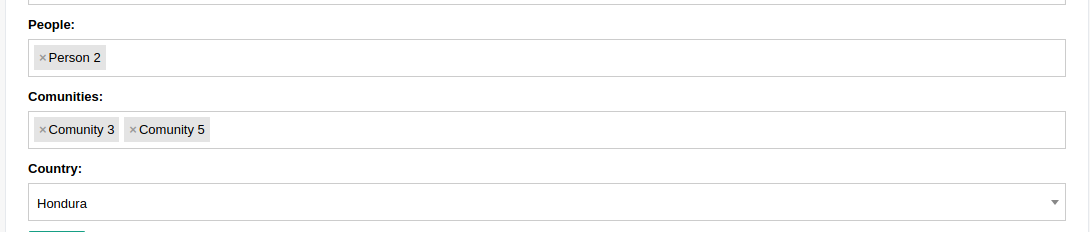
Usage in forms
In model based form:
from djgentelella.widgets.selects import AutocompleteSelect, AutocompleteSelectMultiple
from djgentelella.forms.forms import GTForm
class PeopleGroupForm(GTForm, forms.ModelForm):
    class Meta:
        model = models.PeopleGroup
        fields = '__all__'
        widgets = {
            'name': TextInput,
            'people': AutocompleteSelectMultiple("personbasename"),
            'comunities': AutocompleteSelectMultiple("comunitybasename"),
            'country': AutocompleteSelect('countrybasename')
        }
- As noticed in above example, the last steps are:
Replace the default widget with
AutocompleteSelectorAutocompleteSelectMultiple(this may vary depending of the kind of form used).Send the basename we provided in the lookup class decorator (see previous example) to the widget and it’s ready for usage!
Widget inside modals
Select2 has problems for deal with forms inside modals, but it has an attribute to work with modals, so you can add data-dropdownparent as attr for example
<div id="exampleModal" class="modal" tabindex="-1">
    <div class="modal-body">
       {{form.has_horizontal}}
    </div>
<div>
in forms.py
class Meta:
  widgets={
    'comunities': AutocompleteSelectMultiple("comunitybasename", attrs={'data-dropdownparent': '#exampleModal'}),
  }
Selects groups
Using attrs you can autocomplete options based on others select2, to do that just set data-related as True, add the groupname data-groupname, this need to be shared by all select on group, and add the position order data-pos, this needs to be in ascending order number, is used to know who is the next select when one select is changed, so you need to be sure that numbers don’t repeat and are in order.
class ABCDEGroupForm(GTForm, forms.ModelForm):
  class Meta:
    model = models.ABCDE
    fields = '__all__'
    widgets = {
        'a': AutocompleteSelectMultiple("a", attrs={
            'data-related': 'true',
            'data-pos': 0,
            'data-groupname': 'myabcde'
        }),
        'b': AutocompleteSelect("b", attrs={
            'data-related': 'true',
            'data-pos': 1,
            'data-groupname': 'myabcde'
        }),
In your app gtselects.py set the ref_field to indicate what field use to lookup on queryset.
@register_lookups(prefix="b", basename="b")
class BLookup(BaseSelect2View):
    model = models.B
    fields = ['display']
    ref_field = 'a'
Customs Urls
In some cases you need to pass more data to reverse url, by default -list is appended to the base url name, but you can change it for something like -detail and pass some data like pk, ej.
in forms.py
class Meta:
  widgets={
    'comunities': AutocompleteSelectMultiple("comunitybasename",
                    url_suffix='-detail', url_args=[], url_kwargs={'pk': 1}, }),
  }
Note
the reverse url happen on get_context(self, name, value, attrs) method.
There is some cases when you don’t have the values on compilation moment, so you can overwrite extra_url_args and extra_url_kwargs in widget instance before form render
class Myform(GTForm):
    def __init__(self, *args, **kwargs):
        super().__init__(*args, **kwargs)
        self.fields['comunities'].widget.extra_url_kwargs['pk']=1

    class Meta:
        widgets={
          'comunities': AutocompleteSelectMultiple("comunitybasename", url_suffix='-detail'),
        }
Filter based on inputs inside page
It’s posible to use other inputs included on the search criteria, using attr attribute you can inject html data atributes that start with data-s2filter-, next the name of the search criteria esperated on backend like data-s2filter-myinput, the value it has the html selector on the page.
class PeopleGroupForm(CustomForm, forms.ModelForm):
    class Meta:
        model = models.PeopleGroup
        fields = '__all__'
        widgets = {
            'name': TextInput,
            'people': AutocompleteSelectMultiple("personbasename",
                                                 attrs={
                                                     'data-s2filter-myinput': '#id_name'}),
            }
EditorTinymce widget
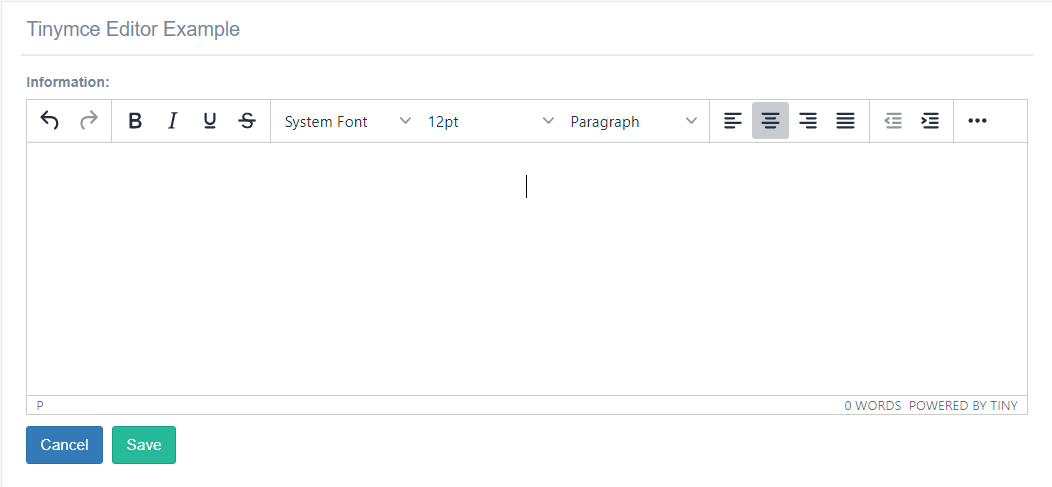
This widget approach used Tinymce-editor js for save in html format the information(text, images, link, tables, videos). You can add this widget only in a TextField.
You need to add in the settings file a attribute with the name Tinymce_UPLOAD_PATH , this field contain a directory to save the upload files.
..code:: python
TINYMCE_UPLOAD_PATH =os.path.join(MEDIA_ROOT, ‘tinymce/’)
Example for use the widget:
from djgentelella.forms.forms import GTForm
from djgentelella.widgets import tinymce as widget

class EditorTinymce(forms.ModelForm,GTForm):

  class Meta():
    model=WysiwygModel
    fields='__all__'
    widgets={
      'information': widget.EditorTinymce,
      'extra_information': widget.EditorTinymce,
    }
- ..note:: To Upload files in the server, you with need to login.
Example to upload images: .. image:: ../_static/uploadImages.gif
YesNoInput widget
This widget try to implement repetitive configurations in yes/no input options, it can be integrated in its basic behavior with minimal configurations.
Simple YesNoInput
- The basic YesNoInput can be set in two ways:
The easiest in Meta
And creating a field in form.
In Meta class:
from djgentelella.widgets import core as genwidgets
from djgentelella.forms.forms import GTForm
from demoapp import models
class YesNoInputForm(forms.ModelForm, GTForm):
    class Meta:
        model = models.yourmodel
        fields = '__all__'
        widgets = {
            'is_public': genwidgets.YesNoInput
        }
Make sure you model has the is_public field and djgentelella will do the dirty work.
As a Form field:
from djgentelella.widgets import core as genwidgets
from djgentelella.forms.forms import GTForm
from demoapp import models
class YesNoInputForm(forms.ModelForm, GTForm):
    is_public = forms.BooleanField(widget=genwidgets.YesNoInput())
    class Meta:
        model = models.yourmodel
        fields = '__all__'
In this example is_public can be an extra field that is not related with the model class in Meta.
Related YesNoInput
This feature can be used when you need to display another field dinamically when the YesNoInput change.
Because it has extra configurations you should declare it in the form as a field as the following example:
from djgentelella.widgets import core as genwidgets
from djgentelella.forms.forms import GTForm
from demoapp import models
class YesNoInputForm(forms.ModelForm, GTForm):
    has_copies = forms.BooleanField(widget=genwidgets.YesNoInput(
        attrs={'rel': ['copy_number']}))
    class Meta:
        model = models.yourmodel
        fields = '__all__'
In rel you can pass an id, field_name or class which is the element or elements that will be show or hide depending of the YesNoInput state.
Multiple Related YesNoInput
This feature can be used when you need to display other fields dinamically when the YesNoInput change.
To this example we will use two ways to related input fields, using field_name and using the input id.
from djgentelella.widgets import core as genwidgets
from djgentelella.forms.forms import GTForm
from demoapp import models
class YesNoInputForm(forms.ModelForm, GTForm):
    has_meta = forms.BooleanField(widget=genwidgets.YesNoInput(
        attrs={'rel': ['#id_year','editorial', '.other_elements']}))
    class Meta:
        model = models.yourmodel
        fields = '__all__'
- As you can see here we define three rel types:
The element id
the field_name which can be a field from your model.
and the elements class that we want to display/show.
External related elements with different shparent
This feature is helpful when you need to show or hide and specific information but is declared in the template, to do this you need to pass the the id of the external element and also you can pass the shparent that where it is wrapped.
To this example we will use two ways to related input fields, using field_name and using the input id.
from djgentelella.widgets import core as genwidgets
from djgentelella.forms.forms import GTForm
from demoapp import models

class YesNoInputForm(forms.ModelForm, GTForm):
    display_publish = forms.BooleanField(widget=genwidgets.YesNoInput(
        attrs={'rel': ['#display_publish_info']}, shparent='.x_panel'))
    class Meta:
        model = models.yourmodel
        fields = '__all__'
Your template is going to look like the following:
{% block content %}
    <div class="x_panel">
        <h2>YesNoInput Widget</h2>
        <div class="x_title"></div>
        <div class="x_content">
            <form method="post" action="">
                {% csrf_token %}
                {{ form.as_horizontal }}
                <div class="pull-right">
                    <button class="btn btn-success" type="submit" name="savebtn" value="save">{% trans 'Save' %}</button>
                    <button id="btn_from_template" class="btn btn-warning" type="submit" >{% trans 'Publish' %}</button>
                </div>
            </form>
        </div>
    </div>
    <div class="x_panel">
        <h2>Extra publish form</h2>
        <div class="x_title"></div>
        <div class="x_content">
            <h2 id="display_publish_info">Extra information to display when display publish is set</h2>
        </div>
    </div>
{% endblock %}
id is the external element that we wanted to show/hide.
shparent Is the container element that djgentelella will look for to hide the full content.
shparent is optional and if you don’t pass it, djgentelella will look for a .form-control class to hide/show it, in that case make sure that your element is wrapped in an form-control element.
Usage of GridSlider, DateGridSlider and SingleGridSlider Widgets
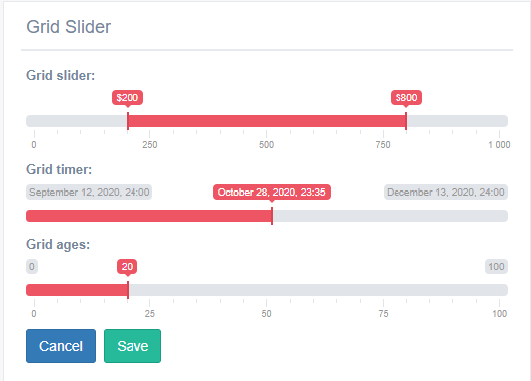

GridSlider It is similar to range input, but this use two pointer represent the min and max value.
SingleGridSlider It is similar to GridSlider, but this only can use a pointer.
DateGridSlider It is similar to SingleGridSlider, but this only receive values type date in format(‘yyyy/mm/dd’).
You can uses this widget in a * CharField , * IntegerField * and *DateTime
How to used it?
You need add in the widget a list with especifics atributes.
- In the GridSlider need to add:
data-min: this atribute receives the min value,in addition can be use with values type integer.
data-max: this atribute receives the max value,in addition can be use with values type integer.
data-step: this atribute receives the step value requerid to reach the maximum or minimum value.
data-grid: this atribute receive true or false value, if the value is true it show a grid under the bar with some step values, but the value is false don’t appear the grid.
data-to_max: this atribute defined the default min value and receive integer or date values.
data-from_min:This defined the default max value and receive integer or date values.
data-from_fixed: this atribute receive true or false value, it function is limit the minimun value for the slider dont move to more that data_to_min atribute.
data-to_fixed:this atribute receive true or false value, it function is limit the maximum value for the slider dont move more that data_to_max atribute
data-prefix: This receive the simbols can use to represent money example: $ and €.
data-hide_min_max:this atribute receive true or false value, it function is appear labels with the min a max value.
data-target_from: this receive the name of one field of the model and that field represent the minimum value of the grid slider.
data-target_to::this receive the name of one field of the model and that field represent the maximum value of the grid slider.
- About the DateGridSlider need to add:
data-min: this atribute receives the min value,in addition can be use with values type date in format (‘YYYY / MM / DD’).
data-max: this atribute receives the max value,in addition can be use with values type date in format (‘YYYY / MM / DD’).
data_from: This defined the default initial value and only date values.
- About the SingleGridSlider need to add:
data-min: this atribute receives the min value,in addition can be use with values type date in format (‘YYYY / MM / DD’).
data-max: this atribute receives the max value,in addition can be use with values type date in format (‘YYYY / MM / DD’).
data_from: This defined the default initial value and only date values.
data-target: this receive the name of one field of the model and that field represent the minimum value of the grid slider.
data-target_from: this atribute receive simbols.
Forms.py
In model based form:
class gridSliderForm(forms.ModelForm, GTForm):
grid_slider = forms.CharField(widget=widget.GridSlider(attrs={'data-min': '0',
                                                              'data-max': '1000',
                                                              'data-step': 2,
                                                              'data-grid': 'true',
                                                              'data-from_fixed': 'false',
                                                              'data-prefix': "$",
                                                              'data-to_fixed': 'false',
                                                              'data-to_max': 750,
                                                              'data-from_min': 200,
                                                              'data-hide_min_max': 'true',
                                                              'data-target-from': 'minimum',
                                                              'data-target-to': 'maximum',
                                                              })
grid_timer = forms.CharField(widget=widget.DateGridSlider(attrs={'data_min': '2020-09-12',
                                                                    'data_max': '2020-12-12',
                                                                    'data_from': '2020-11-12',
                                                                    }))

grid_ages = forms.CharField(widget=widget.SingleGridSlider(attrs={'data-min': '0',
                                                                  'data-max': '100',
                                                                  'data_from': '20',
                                                                  'data-prefix': ' ',
                                                                  'data-target': 'age',
                                                                  }))

class Meta:
    model = models.gridSlider
    fields = '__all__'
    widgets = {
        'minimum': widget.HiddenInput,
        'maximum': widget.HiddenInput,
        'datetime': widget.HiddenInput,
        'age': widget.HiddenInput
    }
As you can see in the previous code you can make the fields of the model can be hidden or any type.
ChunkedUpload widget
This widget approach used django-chunked-upload app for save the files to the respective directory. You can add this widget only in a FileField.
The widget can be use in the Meta or in a field of the form.
In Meta class:
from djgentelella.widgets.core import TextInput
from djgentelella.widgets.files import FileChunkedUpload
from djgentelella.forms.forms import GTForm

class ChunkedUploadItemForm(GTForm, forms.ModelForm):
    fileexample = forms.FileField(widget=FileChunkedUpload, required=False)
    class Meta:
        model = ChunkedUploadItem
        fields = '__all__'
        widgets = {
            'name': TextInput,
            'fileexample': FileChunkedUpload
        }
As a Form field:
from djgentelella.widgets.core import TextInput
from djgentelella.widgets.files import FileChunkedUpload
from djgentelella.forms.forms import GTForm

class ChunkedUploadItemForm(GTForm, forms.ModelForm):
    fileexample = forms.FileField(widget=FileChunkedUpload, required=False)
    class Meta:
        model = ChunkedUploadItem
        fields = '__all__'
Make sure your model has the fileexample or the name of the field do you using to save file in your model.
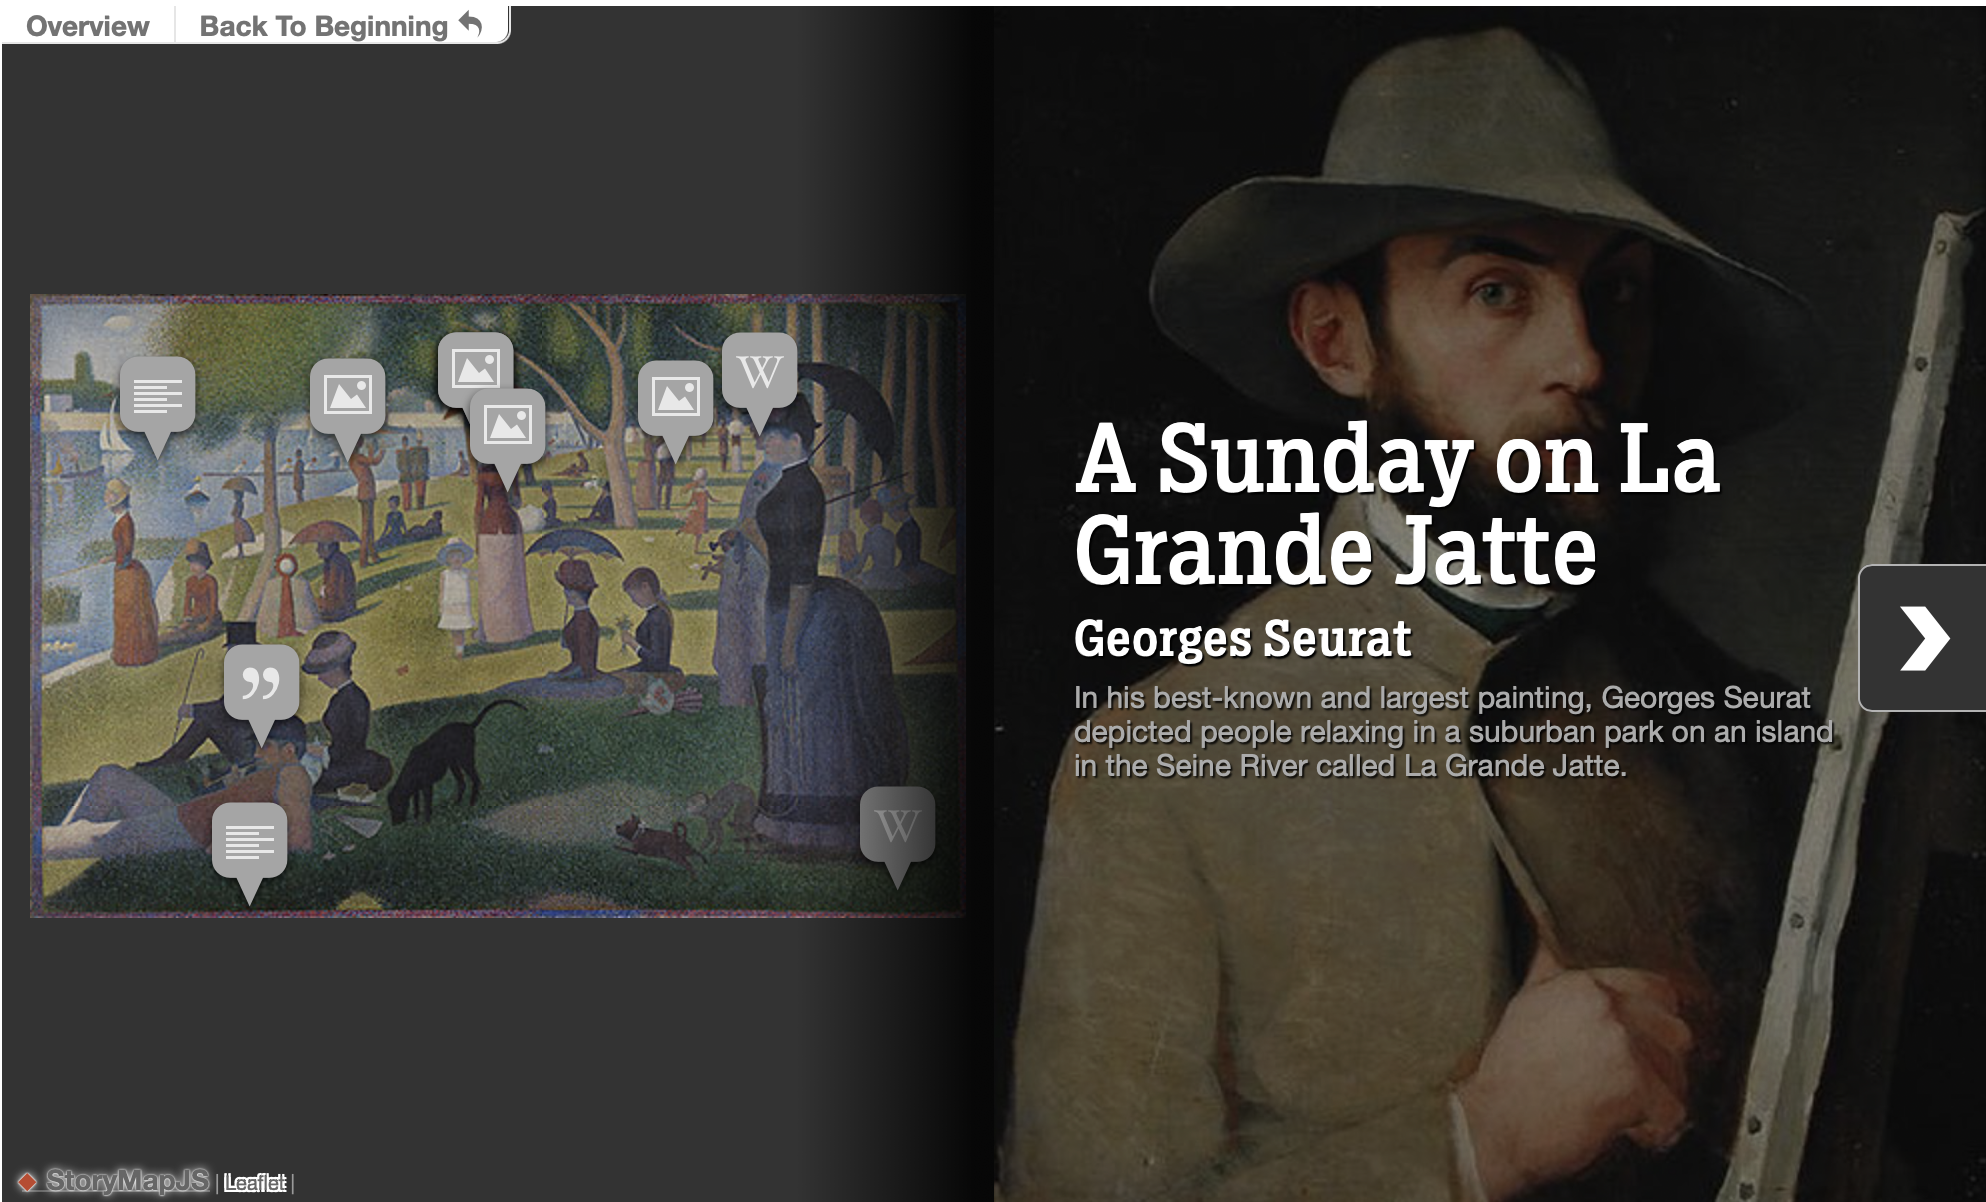
StoryMaps Widgets
There are 2 diferent storymap types:
Giga-Pixel StoryMap
Note
This widget is ReadOnly so no data input is send on form submit.
You must have to:
Create a lookup channel in
app/gtstorymap.pybased in the model we want to use as options in the widget.Replace default widget in form with
GigaPixelStoryMapInput.
Map-Based StoryMap
Note
This widget is ReadOnly so no data input is send on form submit.
You must have to:
Create a lookup channel in
app/gtstorymap.pybased in the model we want to use as options in the widget.Replace default widget in form with
MapBasedStoryMapInput.
Usage in forms.py
In model based form:
from djgentelella.widgets.storymap import GigaPixelStoryMapInput
from djgentelella.forms.forms import GTForm
from django.urls import reverse_lazy
class ExampleForm(GTForm, forms.ModelForm):
    timeline = forms.CharField(widget=GigaPixelStoryMapInput(
            attrs={"data-url": reverse_lazy('examplestorymapgp-list'),
                "storymap_options": gigapixel_storymap_options
            }), required=False)
    class Meta:
        model = models.MyModel
        fields = '__all__'
- As noticed in above example, the last steps are:
Create a CharField with widget as GigaPixelStoryMapInput add data-url including the basename plus -list.
Se field as required = False
You can set initial data with form(initial={}) changing the data-url attribute when value is not None on the field.
More see: https://storymap.knightlab.com/advanced/#json-syntax
Note
Static files for this widget are not loaded by default so you need to load CSS and JS for this widget to prevent.
You can define what library you want using define_true tag, in this way:
{% load gtsettings %}
{% block pre_head %}
    {% define_true  "use_readonlywidgets" %}
{% endblock %}
or set on setting.py the follow dict to load always all static
DEFAULT_JS_IMPORTS = {
    'use_readonlywidgets': True
}
Calendar Widget
Calendar widget to display and interact with events.
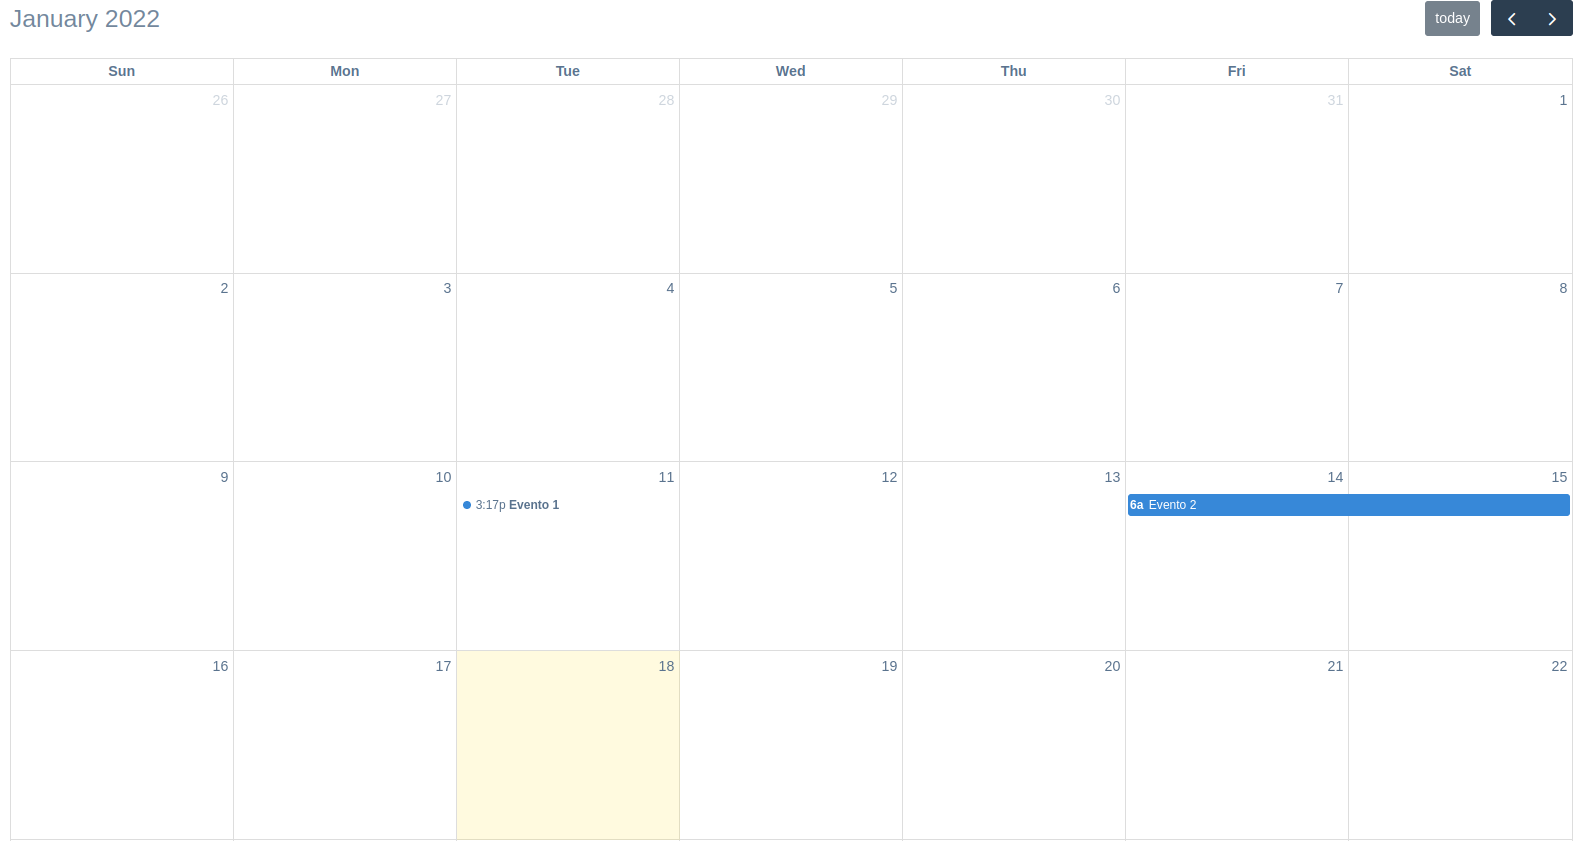
Note
This widget is ReadOnly so no data input is send on form submit.
The widget has these three parameters:
attrs: Dict withe the attributes of the HTML element of the widget.
calendar_attrs: Dict with the settings the calendar object.
events: List of objects with the events proper data to render in the calendar.
Usage in forms.py
In model based form:
from djgentelella.widgets.calendar import CalendarInput
from djgentelella.forms.forms import GTForm
class PeopleLineForm(GTForm, forms.ModelForm):
    calendar = forms.CharField(
        widget=CalendarInput(
            required=False,
            calendar_attrs={'initialView': 'listWeek'},
            events=Event.objects.all().values()
        )
    )
    class Meta:
        model = models.MyModel
        fields = '__all__'
As noticed in above example, you can create a model with the event fields and pass a queryset as the events parameter, you need to apply the values() function to pass it as a list of dictionaries.
In the future, the calendar will be able to return a list of events on form submit.
All the calendar settings and events API can be found in https://fullcalendar.io/docs
Note
Static files for this widget are not loaded by default so you need to load CSS and JS for this widget to prevent.
You can define what library you want using define_true tag, in this way:
{% load gtsettings %}
{% block pre_head %}
    {% define_true  "use_readonlywidgets" %}
{% endblock %}
or set on setting.py the follow dict to load always all static
DEFAULT_JS_IMPORTS = {
    'use_readonlywidgets': True
}
Storyline Widget

Note
This widget is ReadOnly so no data input is send on form submit.
2 requirements must be achieved to use these widgets
Create a lookup channel in
app/gtstoryline.pybased in the model we want to use as options in the widget.Replace default widget in form with
UrlStoryLineInput.
Defining Lookups for usage in widgets
An example on how a lookup must be defined:
import datetime
from djgentelella.groute import register_lookups
from djgentelella.views.storyline import StorylineBuilder

@register_lookups(prefix="storyline", basename="examplestoryline")
class StorylineExample(StorylineBuilder):

    def create_options(self):
        pass
    def create_csv(self):
        return []
Based in above example we need:
- A decorator named register_lookups defined above the lookup class that receives two parameters:
A prefix, which is basically the model name in lowcaps
A basename, which is a meaningful name that will help you differentiate between multiple lookups
A class that inherits from the custom class StorylineBuilder which is responsible of creating an url that exposes the model data in a way the widget urderstands it, so to make it works the class needs to overwrite the methods.
Details on the methods override:
- Create options: This method should return a dictionary containing the storyline settings, with the following characteristics:
- a “data” dictionary containing three obligatory fields:
datetime_column_name: a case and space sensitive string that is the value in the first row of the column containing the dates for the X-coordinates of the chart.
datetime_format: a string that tells StorylineJS how to interpret the value in your datetime_column. The format should be as specified with [d3-time-format](https://github.com/d3/d3-time-format/blob/master/README.md#locale_format)
data_column_name: a a case and space sensitive string that is the value in the first row of the column of your file which has the values to be used for the Y-coordinates of the chart.
- a “chart” object with the following keys:
datetime_format: a string telling StorylineJS how to display dates, used mostly for the X-axis labels, but also used for cards if no display_date is specified. The format should be as specified with [d3-time-format](https://github.com/d3/d3-time-format/blob/master/README.md#locale_format)
y_axis_label (optional): Use this to indicate the units for the Y values in your chart. If this is left out, then data.data_column_name will be used.
- a “slider” dictionary that contains the following attributes:
start_at_card: A string defining at which card you want the slider to be positioned when first rendered,
title_column_name: The exact title of the column with the titles information,
text_column_name: The exact name of the column with the texts information,
- Create csv: this method should return a list of strings, where the first string contains the datetime-column name, the data-column name, the title column name and the text column name (they should match with the information assigned in the options object.
CSV format should be separated by commas, and the quantity of columns of the data cannot surpass the columns in the header row (the first one)
It could have less columns than the header, nonetheless needs at least the first two, containing datetime and data information, otherwise will fail.
Usage in forms.py
In model based form:
from djgentelella.widgets.storyline import UrlStoryLineInput
from djgentelella.forms.forms import GTForm
from django.urls import reverse_lazy
class PeopleLineForm(GTForm, forms.ModelForm):
    storyline = forms.CharField(widget=UrlStoryLineInput(
            attrs={"data-url": reverse_lazy('examplestoryline-list'),
                    "height: 500, "width": 600",
                     "data-url_name": 'examplestoryline'
            }))
    class Meta:
        model = models.MyModel
        fields = '__all__'
- As noticed in above example, the last steps are:
Create a CharField with widget as UrlStoryLineInput add data-url including the basename plus -list.
It is mandatory to also send “height” and “width” in the attributes, as well as a “data-url_name” field with the exact basename. (used internally to redirection).
You can set initial data with form(initial={}) changing the data-url attribute when value is not None on the field.
In the example data-url_name the prefix data- is used to indicate data Html element, and url_name is the attribute name.
Note
Static files for this widget are not loaded by default so you need to load CSS and JS for this widget to prevent.
You can define what library you want using define_true tag, in this way:
{% load gtsettings %}
{% block pre_head %}
    {% define_true  "use_readonlywidgets" %}
{% endblock %}
or set on setting.py the follow dict to load always all static
DEFAULT_JS_IMPORTS = {
    'use_readonlywidgets': True
}
Digital Signature
This component allows us to digitally sign documents, and the interface to perform this process.
It is important to highlight that for this process we will use ‘Firmador Libre’, which is an application that facilitates the signing of documents.
Configurations
This process is done through a socket, which communicates with an API, free signer, and our project. So we will configure our project to carry out this process.
1. Configurations in settings.py
Djgentelella already implements the required libraries for the following configurations:
Add to
INSTALLED_APPS:INSTALLED_APPS = [ # others apps "corsheaders", # ... ]Add the
MIDDLEWARE:MIDDLEWARE = [ "corsheaders.middleware.CorsMiddleware", "django.middleware.security.SecurityMiddleware", # others middlewares... ]Add the
CORS_ALLOW_ALL_ORIGINS:CORS_ALLOW_ALL_ORIGINS = Trueor:
CORS_ALLOWED_ORIGINS = [
    "http://localhost:3000",
    "https://tudominio.com",
]
Add channels in
INSTALLED_APPS:INSTALLED_APPS = [ # others apps "channels", # ... ]Add variables in
settings.py:# change the value demo for your project in all variables # websocket DJANGO_ASETTINGS_MODULE = "demo.asettings" GUNICORN_BIND = "127.0.0.1:9022" if DEBUG else "unix:/run/supervisor/gunicorn_asgi.sock" GUNICORN_ASGI_APP = "demo.asgi:application" GUNICORN_WSGI_APP = "demo.wsgi:application" GUNICORN_WORKERS = 1 if DEBUG else 2 GUNICORN_WORKER_CLASS = "demo.asgi_worker.UvicornWorker" GUNICORN_USER = "demo" GUNICORN_GROUP = "demo" # firmador libre FIRMADOR_CORS = "http://127.0.0.1:8000" FIRMADOR_WS = "ws://127.0.0.1:9022/async/" FIRMADOR_WS_URL = FIRMADOR_WS + "sign_document" FIRMADOR_DOMAIN = "http://localhost:9001" FIRMADOR_VALIDA_URL = FIRMADOR_DOMAIN + "/valida/" FIRMADOR_SIGN_URL = FIRMADOR_DOMAIN + "/firma/firme" FIRMADOR_SIGN_COMPLETE = FIRMADOR_DOMAIN + "/firma/completa" FIRMADOR_DELETE_FILE_URL = FIRMADOR_DOMAIN + "/firma/delete"
2. Add files for asgi configuration
Update a file
asgi.pyin main app:from djgentelella.firmador_digital.config.asgi_config import AsgiConfig application = AsgiConfig("demo.settings").applicationCreate a file
asgi_worker.pyin main app:from uvicorn_worker import UvicornWorker as BaseUvicornWorker class UvicornWorker(BaseUvicornWorker): CONFIG_KWARGS = {"lifespan": "off", "loop": "auto", "http": "auto"}Create a file
auls.pyin main app:urlpatterns = []Create a file
asettings.pyin main app:from .settings import * ROOT_URLCONF = "my_main_app.aurls"
Widget Variables
ws_url: The URL of the WebSocket that connects to the digital signing service.
cors: The URL and port where the application is running, which communicates with the signing service. This setting configures the necessary CORS permissions.
title: An optional title displayed in the widget’s HTML interface, allowing customization of the widget’s presentation.
default_page: Specifies the default page to load when displaying the document. Accepted values include:
"last": Loads the last page of the document."first": Loads the first page of the document.A numeric value: Loads the page corresponding to the given number.
Example Implementation in a Form
Below is an example of how the DigitalSignatureForm is implemented:
class DigitalSignatureForm(GTForm, forms.ModelForm):

    class Meta:
        model = DigitalSignature
        fields = ['file']
        widgets = {
            'file': DigitalSignatureInput(
                ws_url="%s" % settings.FIRMADOR_WS_URL,
                cors="%s" % settings.FIRMADOR_CORS,
                title=_("Widget Digital Signature"),
                default_page="last"
            )
        }
DigitalSignatureFileAPIView Documentation
Description
The DigitalSignatureFileAPIView is a Django REST Framework API view designed to serve PDF documents that are associated with digital signatures. This endpoint uses a custom renderer to output the PDF file content.
Renderer
PDFRenderer: This custom renderer class is responsible for rendering the PDF content correctly when a GET request is made to this API view.
HTTP Methods
GET: Retrieves the PDF file for a given digital signature.
URL Parameter: -
pk: The primary key of the digital signature record.Process: 1. Tries to retrieve a
DigitalSignatureinstance from the database using the providedpk. 2. If the instance does not exist, returns a404 Not Foundresponse with a message indicating that the file was not found. 3. If the instance is found, the associated file is read in binary mode. 4. The binary data is then returned with the content type set toapplication/pdf.
Response Codes
200 OK: The request was successful and the PDF file content is returned.
404 Not Found: The digital signature with the specified primary key does not exist.
Example Implementation
Below is the example implementation of the API view:
from rest_framework.views import APIView
from rest_framework.response import Response
from rest_framework import status

from demoapp.models import DigitalSignature
from djgentelella.firmador_digital.consumers.pdf_render import PDFRenderer


class DigitalSignatureFileAPIView(APIView):
    renderer_classes = [PDFRenderer]

    def get(self, request, pk, format=None):
        try:
            signature = DigitalSignature.objects.get(pk=pk)
        except DigitalSignature.DoesNotExist:
            return Response({"detail": "File not found"}, status=status.HTTP_404_NOT_FOUND)

        file_path = signature.file.path
        with open(file_path, 'rb') as f:
            file_data = f.read()

        return Response(file_data, content_type='application/pdf')
Digital Signature View Documentation
Description
The digital_signature_view is a Django view that renders the digital signature interface. It is responsible for providing the digital signature form to the associated template, enabling users to interact with the digital signature process.
Template Rendering
Template Path: The view renders the template located at
gentelella/digital_signature/digital_signature.html. This template is designed to display the digital signature form and related elements.
Context Variables
form: The context dictionary includes an instance of
DigitalSignatureForm. - The form is instantiated with the prefix"update"to ensure unique field naming, particularly useful if multiple forms are present on the same page.
Usage
This view is typically connected to a URL in the Django project’s URL configuration, making the digital signature interface accessible to users.
Example Implementation
from django.shortcuts import render
from .forms import DigitalSignatureForm

def digital_signature_view(request):
    return render(
        request,
        'gentelella/digital_signature/digital_signature.html',
        context={
            'form': DigitalSignatureForm(prefix='update'),
        }
    )
DigitalSignature Model Documentation
Description
The DigitalSignature model is designed to manage digital signature files within the application. It encapsulates the core fields required for handling documents that need to be digitally signed. The three fundamental fields are:
file: Contains the actual document to be signed.
filename: Stores the name of the file.
pk: An auto-generated primary key provided by Django.
In addition, the model includes extra fields to enhance traceability and uniqueness.
Model Fields
pk: The auto-generated primary key of the model, created by Django.
file_code: A unique UUID field used to uniquely identify each digital signature entry. It is generated by
uuid.uuid4and is not editable.filename: A character field (maximum length of 50) that holds the name of the file. This field is optional (can be null or blank) and is automatically populated from the file name if not provided.
file: A file field that stores the digital signature document. Files are uploaded to the
digital_signature/directory.created: A timestamp set automatically when the record is first created.
updated: A timestamp updated automatically whenever the record is saved.
Custom Methods
save(): Overrides the default save method to populate the
filenamefield automatically using the uploaded file’s name (if the filename is not already set). After this customization, it calls the parent class’s save method.__str__(): Returns the
filenameif available; otherwise, it returns the string representation of thefile_code.
Example Implementation
class DigitalSignature(models.Model):
    file_code = models.UUIDField(unique=True, default=uuid.uuid4, editable=False)
    filename = models.CharField(max_length=50, null=True, blank=True)
    file = models.FileField(upload_to='digital_signature/')
    created = models.DateTimeField(auto_now_add=True)
    updated = models.DateTimeField(auto_now=True)

    def save(self, *args, **kwargs):
        # Add name to filename if not provided
        if not self.filename and self.file:
            self.filename = self.file.name.split('/')[-1]
        super().save(*args, **kwargs)

    def __str__(self):
        return self.filename or str(self.file_code)
Digital Signature Template Documentation
Overview
This template renders the digital signature interface within the Django application. It extends the base site template and loads the required tags for configuration and static file management. The template displays a digital signature form and defines essential JavaScript variables that control the signature process.
Template Structure
Extends: The template extends
gentelella/base_site.htmlto inherit the site’s layout and styles.Template Tags: It load
staticfor handling static files.Content Block: The main content is wrapped in a card layout. Inside this layout, a digital signature form is rendered, complete with CSRF protection. The form is submitted (via a hidden submit button) to process the digital signature.
Key JavaScript Variables
Within the js block, two important variables are defined:
- urls:
sign_doc: The URL to the document that needs to be signed. This URL is obtained from the API endpoint created to serve the document.
logo: The URL for the logo image, loaded from the static files. This image is displayed in the PIN entry window of the digital signature interface. This variable is optional and can be omitted if no logo is required.
- doc_instance:
pk: The primary key of the digital signature document.
model: The name of the model managing the document files, in this case,
DigitalSignature.app: The name of the Django app (
demoapp) where the model is defined.
Example Template Implementation
{% extends 'gentelella/base_site.html' %}
{% load static %}

{% block content %}
    {# Container #}
    <div class="row">
        <div class='col-12'>
            <div class="card">
                <div class="card-body">
                    {# Title page #}
                    <div class="card-title titles">
                        <h1 class="text-center"> Digital Signature </h1>
                    </div>
                    {# Main content #}
                    <main>
                        {# Form #}
                        <div class="my-3">
                            <form action="" method="POST">
                                {% csrf_token %}
                                {# Widget #}
                                {{ form }}
                                <input type="submit" id="hidden-submit" style="display: none;">
                            </form>
                        </div>
                    </main>
                </div>
            </div>
        </div>
    </div>
{% endblock %}

{% block js %}
    <script>
        const urls = {
            // File to sign: URL obtained from the API that serves the document.
            sign_doc: "{% url 'digital_signature_file_api' pk=2 %}",
            // Logo: URL in static files for the image displayed in the PIN entry window.
            logo: "{% static 'gentelella/images/firmador.ico' %}",
        }
        const doc_instance = {
            // Primary key of the document.
            "pk": 2,
            // Model name used to manage the document files.
            "model": "DigitalSignature",
            // Django app where the model is defined.
            "app": "demoapp",
        }
    </script>
{% endblock %}
Conclusion
This template integrates both the visual interface for initiating a digital signature process and the necessary JavaScript configuration. The variables defined in the urls and doc_instance objects are essential as they establish the API endpoint for retrieving the document and identify the document instance within the application.
Extras for Widget Functionality
User Signature Configuration
To fully enable the digital signature widget, additional configuration per user is required.
- UserSignatureConfig Record:
Access the Django admin interface and create a record of type
UserSignatureConfig.Associate the configuration record with the appropriate user.
This record stores user-specific settings necessary for the proper functioning of the digital signature widget.
Optionally, implement a CRUD interface to manage these configurations within the application.
Document Record Management
A corresponding document record must be created that links a file with its primary key.
- Document Record:
The record should include the file to be signed and its auto-generated primary key (
pk).This record can be created through the Django admin or via a custom CRUD interface.
The information stored in this record is used by the widget to locate and process the correct document.
Widget Configuration Integration
The following JavaScript variables are critical for the widget’s operation:
doc_instance:
const doc_instance = {
    // Primary key of the document.
    "pk": 2,
   ...
}
urls:
const urls = {
    // File to sign: URL obtained from the API that serves the document.
    sign_doc: "{% url 'digital_signature_file_api' pk=2 %}",
    ...
}
Summary
To ensure proper functionality of the digital signature widget:
Create and manage a
UserSignatureConfigrecord via the admin or a custom CRUD interface to store user-specific settings.Ensure a document record exists that associates the file with its primary key (
pk), also manageable via the admin or a CRUD interface.Integrate these settings into the widget using the
doc_instanceandurlsvariables, which provide the necessary API endpoint and static asset references.